Create Invoices in Minutes with Tymora
If you’ve ever chased a payment so many times you could recite your invoice number in your sleep, you’re not alone.
Recent surveys show that 61% of late payments happen because of unclear invoices or lack of consistent follow-ups. And for small businesses, these delays cost an average of $5,000 annually in lost income.
Tymora’s Invoices feature was built to make sure that doesn’t happen to you — not just by sending bills, but by making the whole process smoother, faster, and easier to track.
Let’s walk through exactly how you can create, send, and manage invoices in Tymora — and why it’s a smarter way to get paid.
Table of Contents
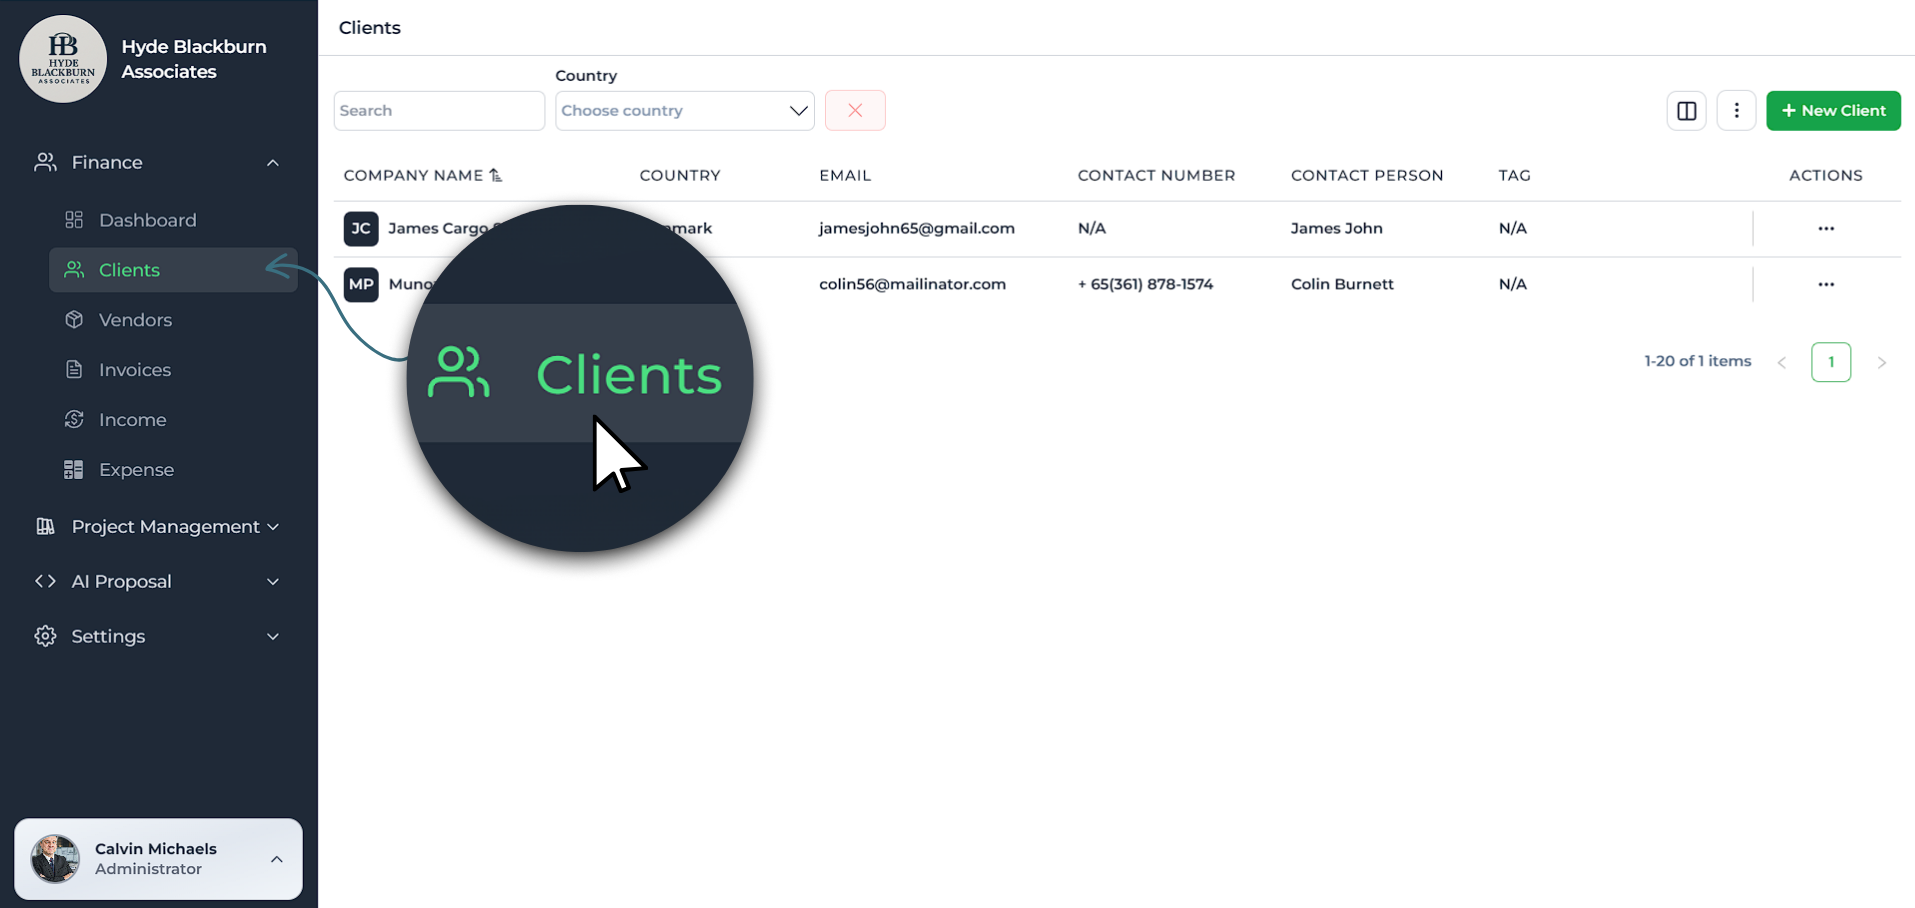
Step 1: Add a Client
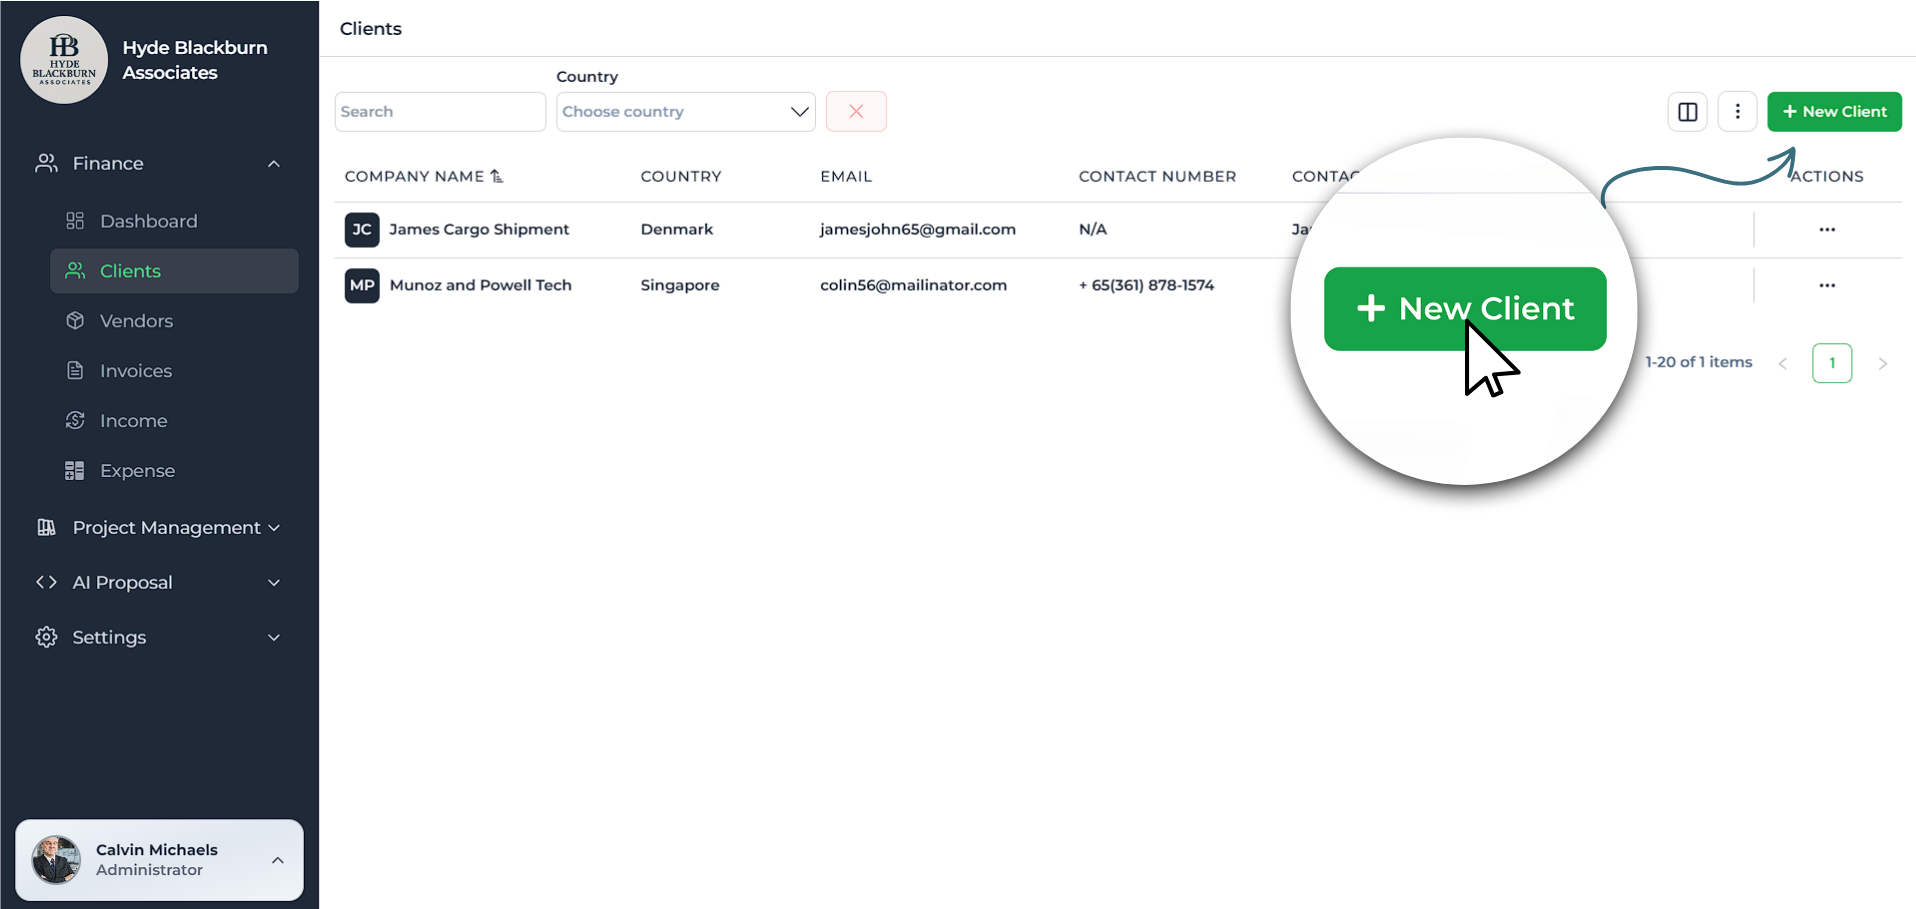
Before creating any invoice, you’ll need to add your client details. Go to the Clients section and click Add Client.
Here, you’ll fill out important information:
- Client Name & Company Name – Who you’re billing.
- Email Address – This is where invoices will be sent.
- Phone Number – Optional, but handy for follow-ups.
- Billing Address – Ensures your invoice looks professional.
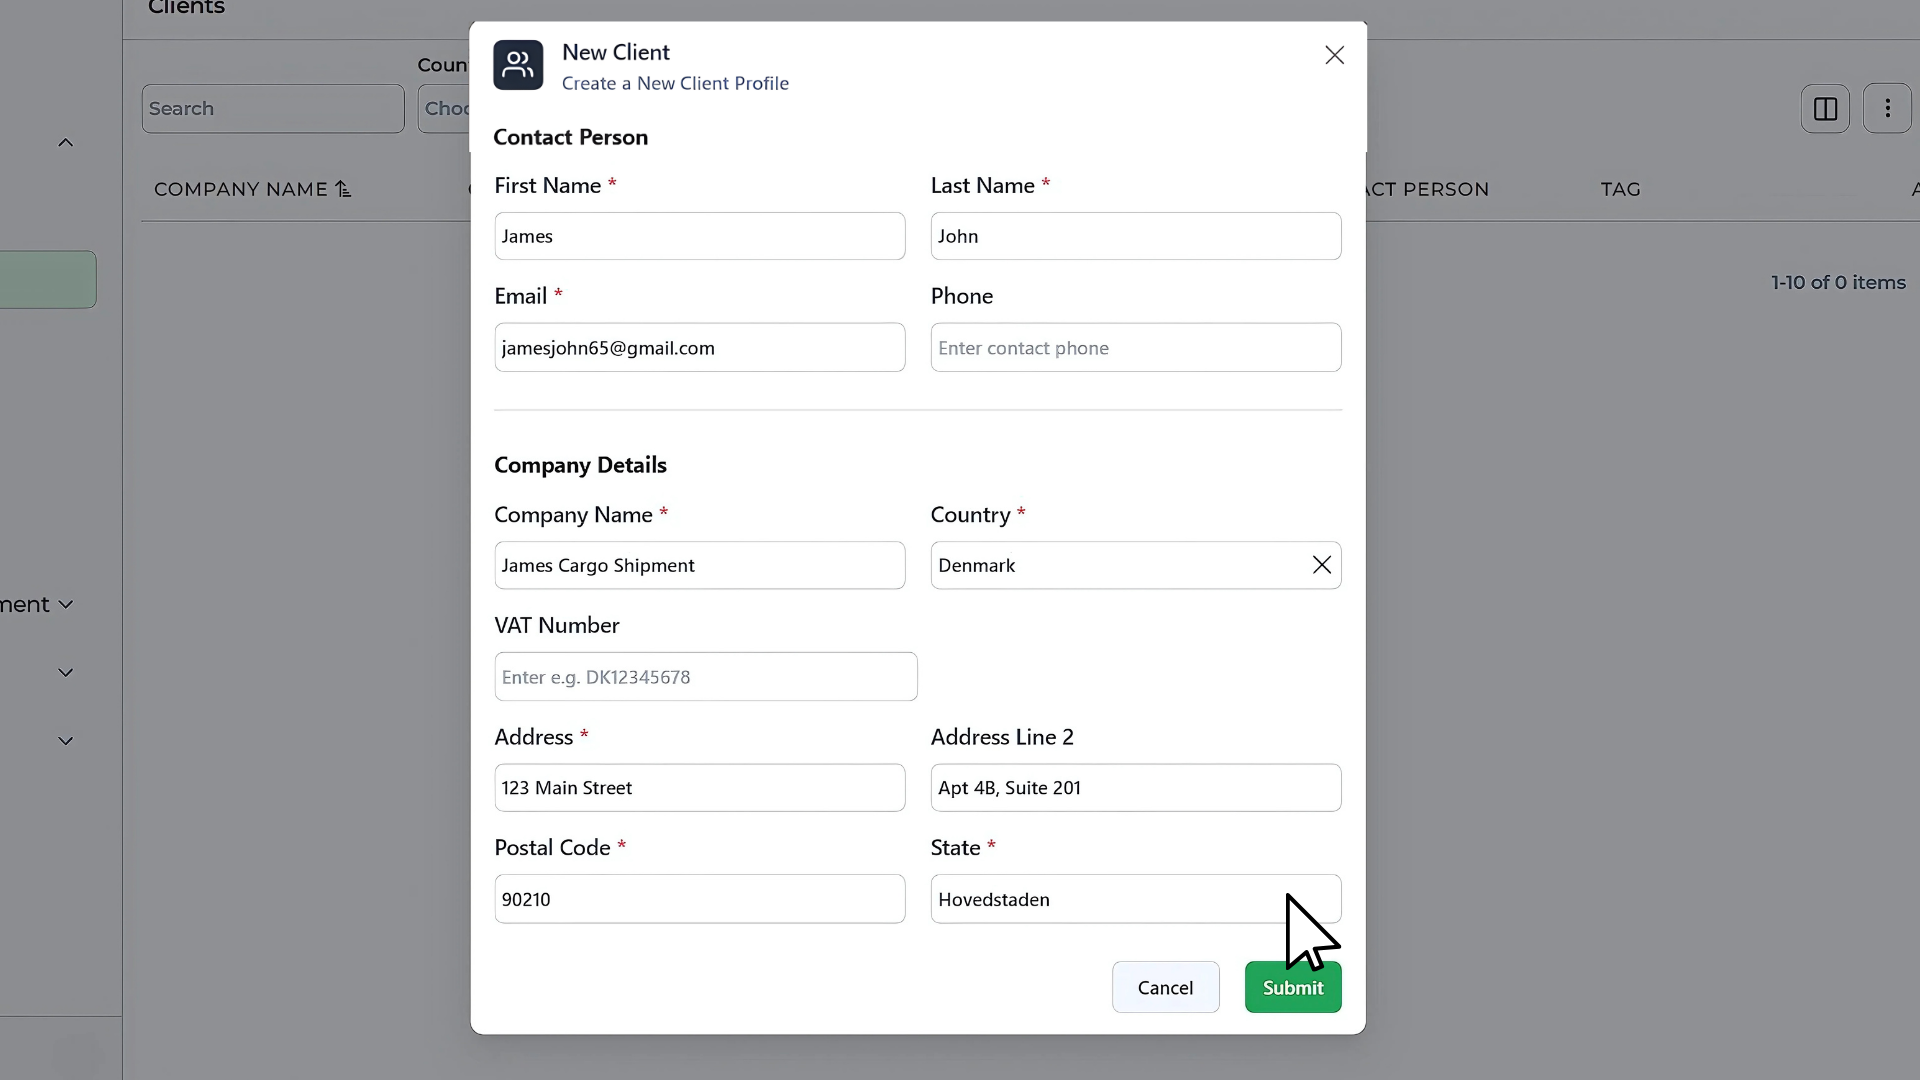
Tip: The more details you add here, the less manual entry you’ll need to do later.
Once saved, this client is stored in your Tymora account and can be selected every time you create a new invoice.
Step 2: Create a New Invoice
Here you’ll fill in:

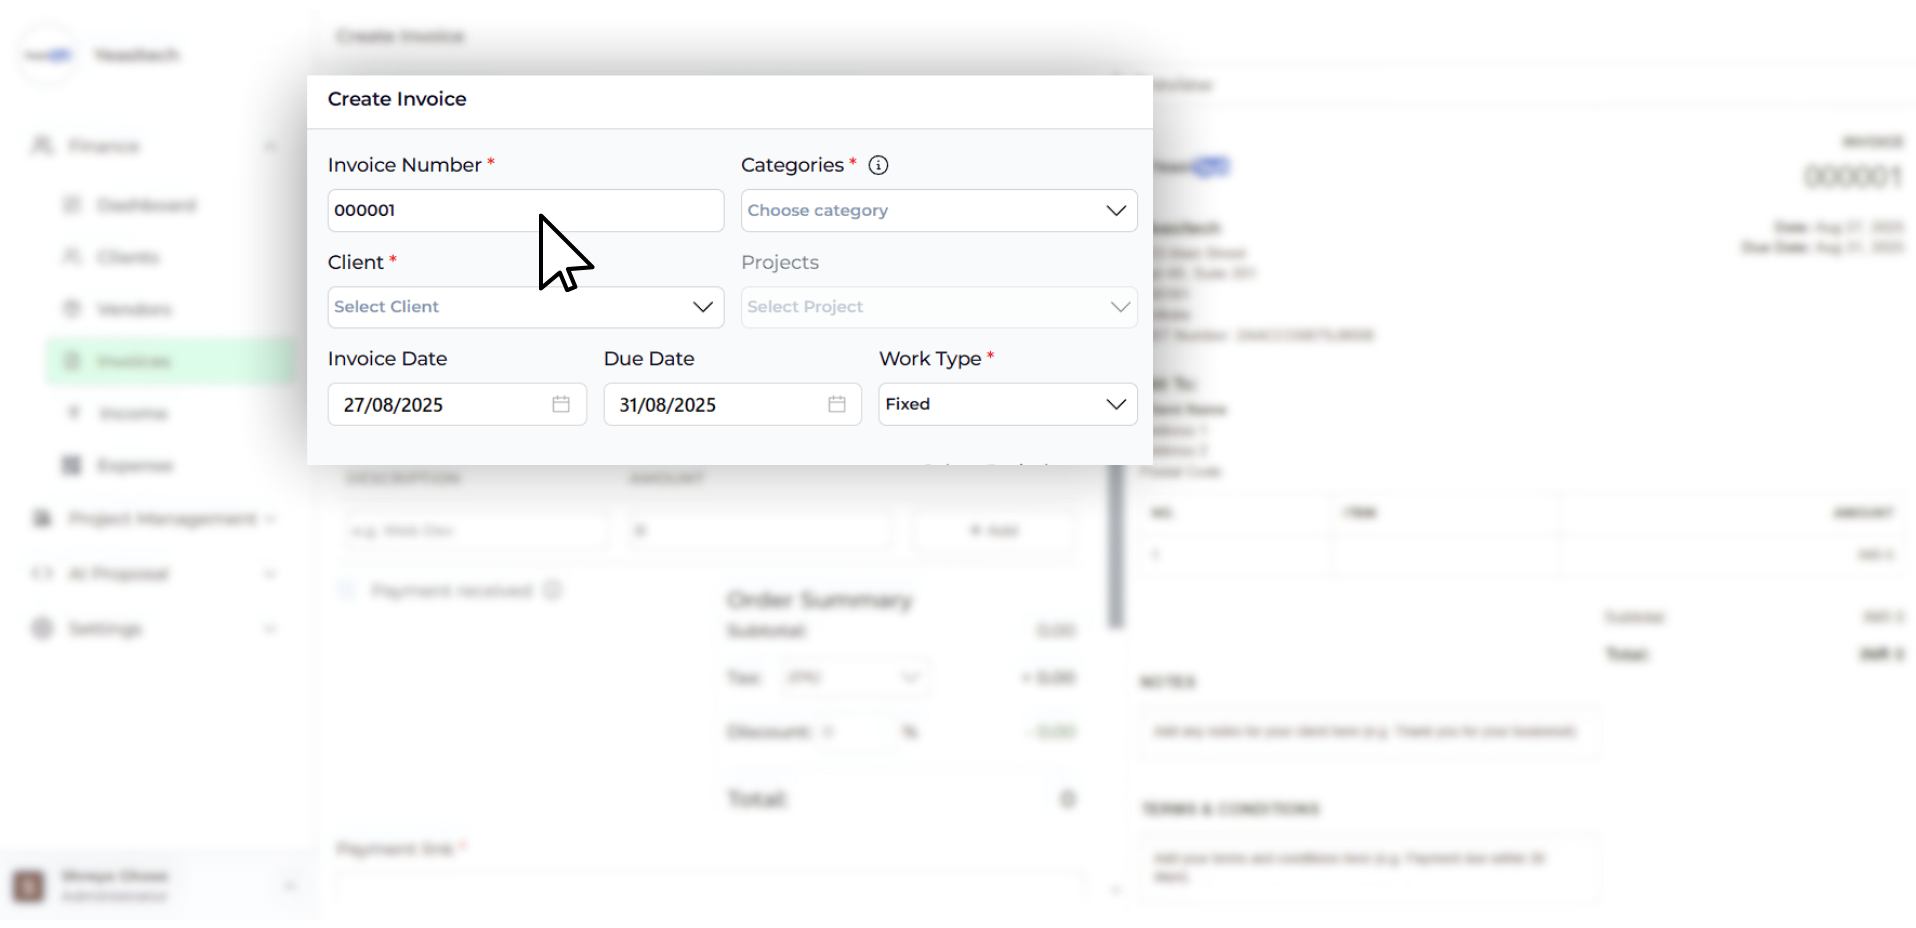
- Invoice Number – Tymora generates this automatically, but you can edit it to match your existing invoice numbering.
- Client – Select from your existing list or add a new client on the spot.
- Category – Organize your invoices by service type (e.g., Fixed, Partner, Recurring).
- Project – Link the invoice to a specific project for easier tracking.
- Invoice Date & Due Date – Clear timelines help clients know exactly when payment is expected.
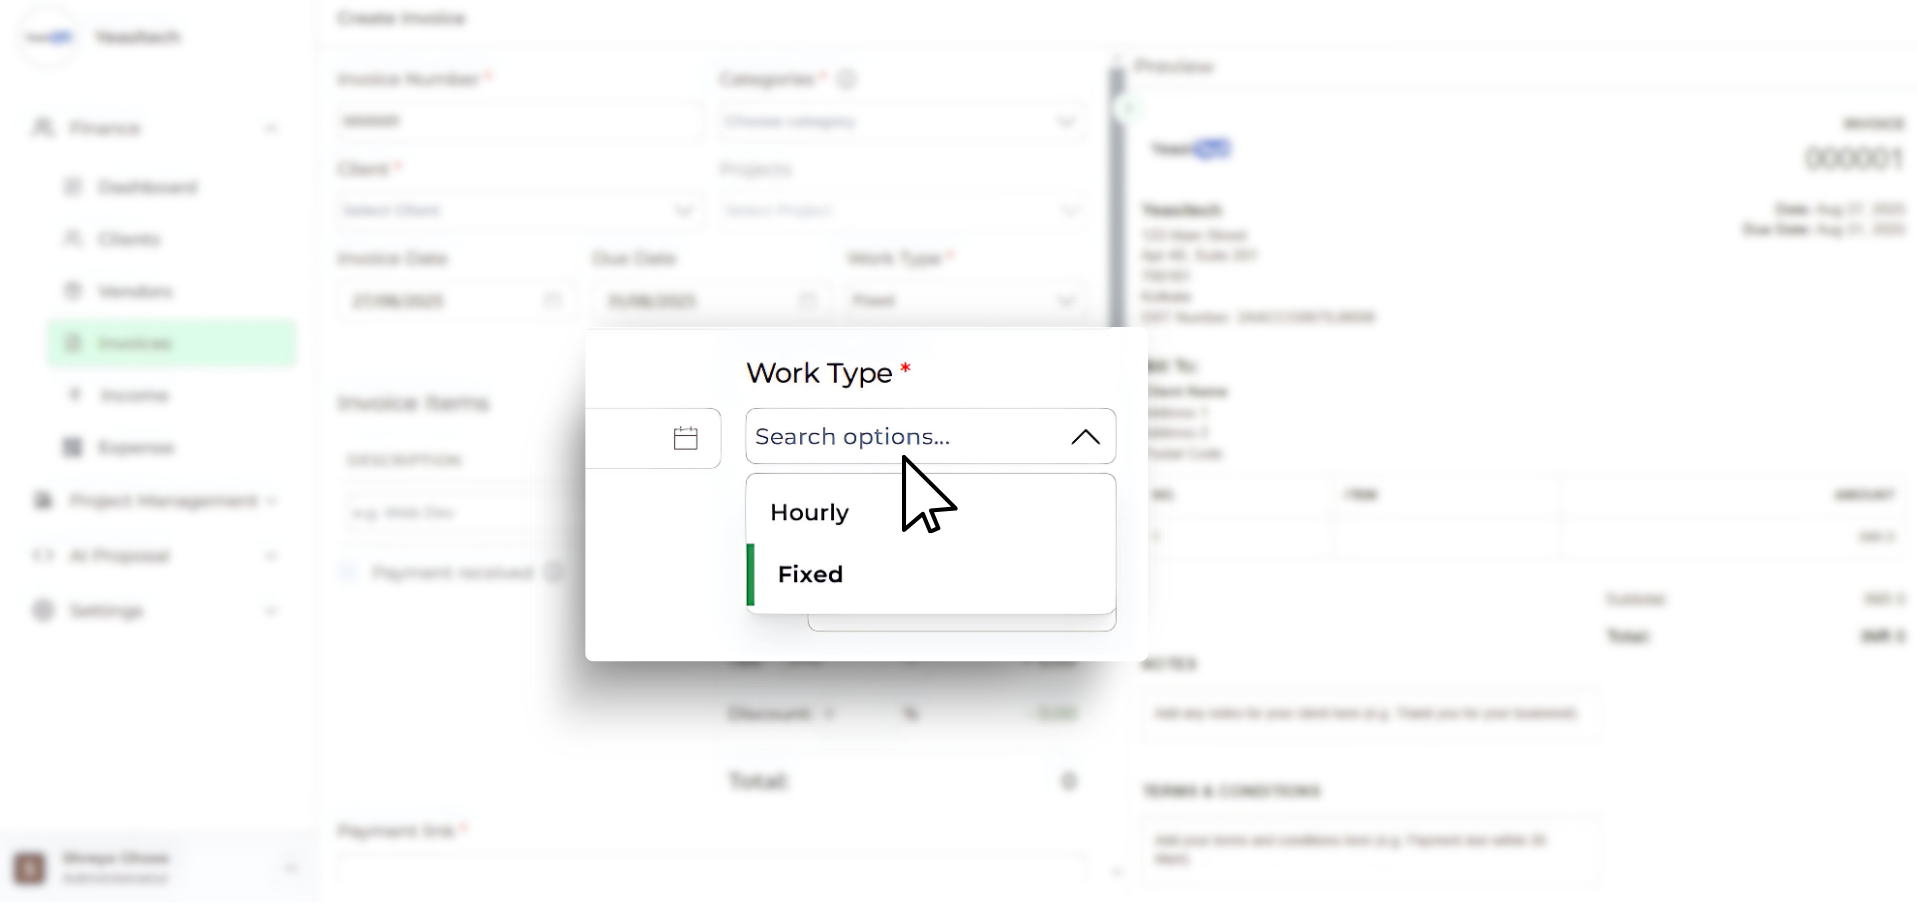
- Work Type – Choose Fixed Price for a set amount or Hourly if you’re charging for time spent.
Tip: Always set a due date—clients are more likely to pay promptly when there’s a clear deadline.
Step 3: Invoice Items
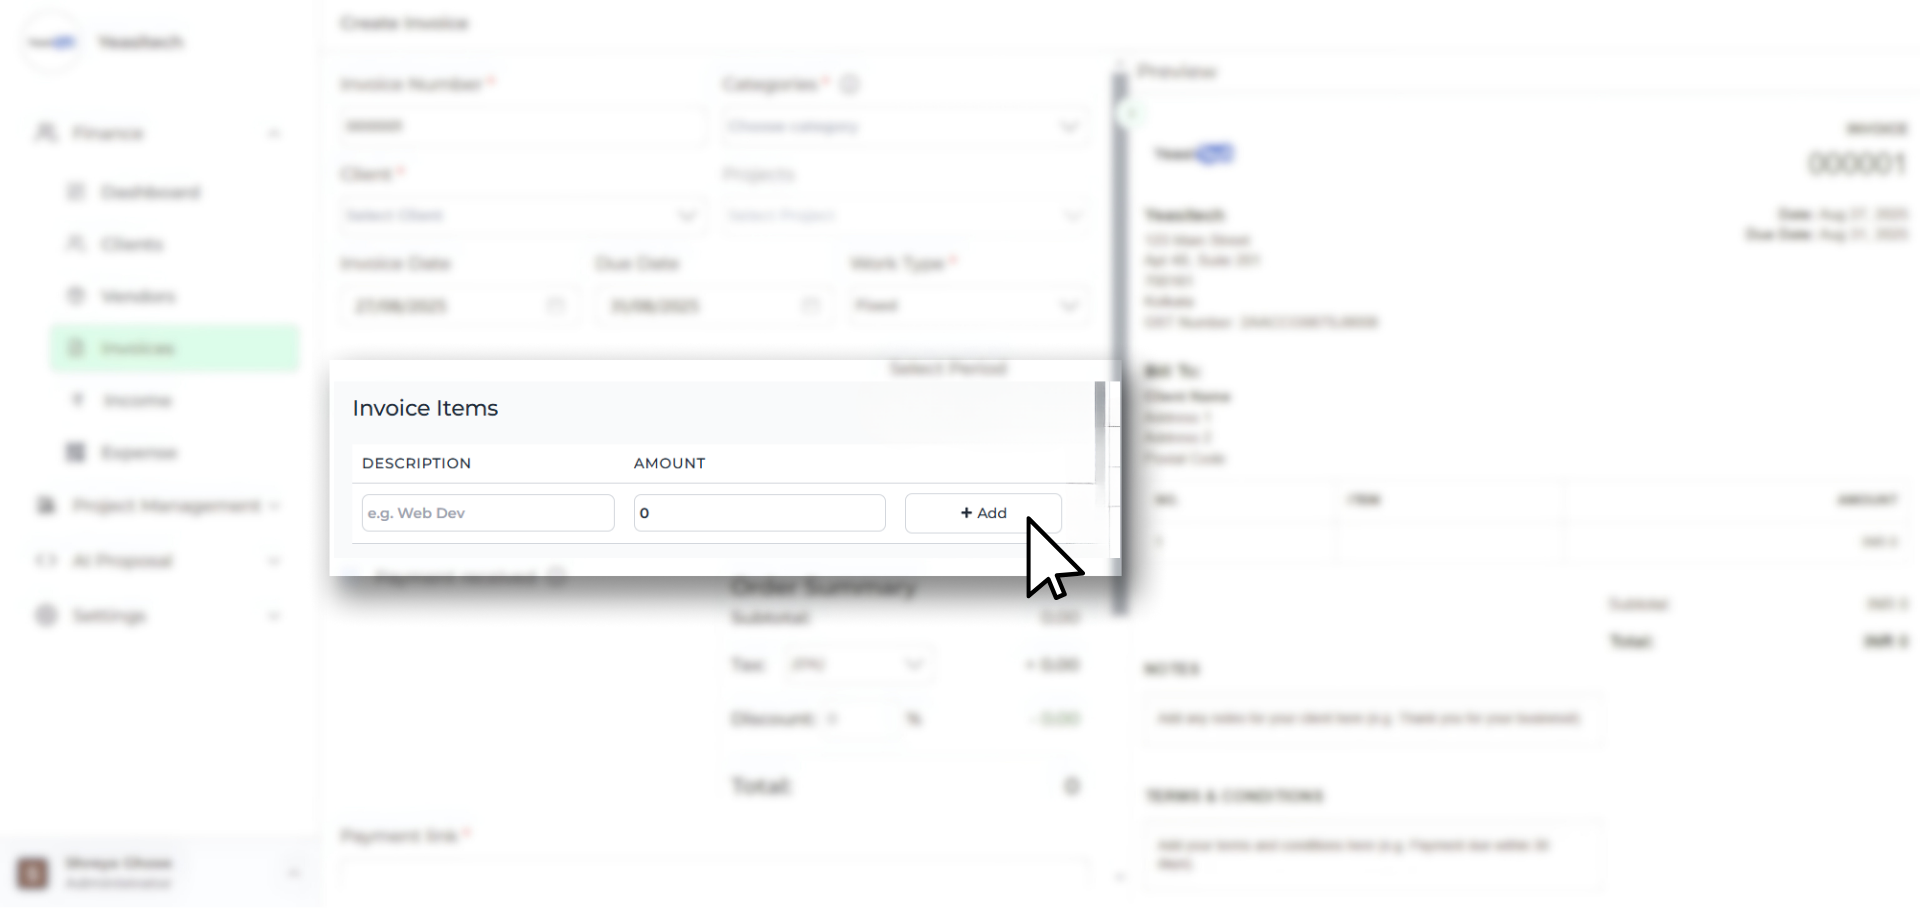
This is where you list what you’re billing for.
For each item, you can enter:
- Description – Be specific (e.g., “Landing Page Design – includes mobile optimization”).
- Amount (for fixed work) or Hourly Rate & Hours (for time-based work).
Click + Add to include as many items as needed. Tymora calculates the totals automatically—no manual math required.
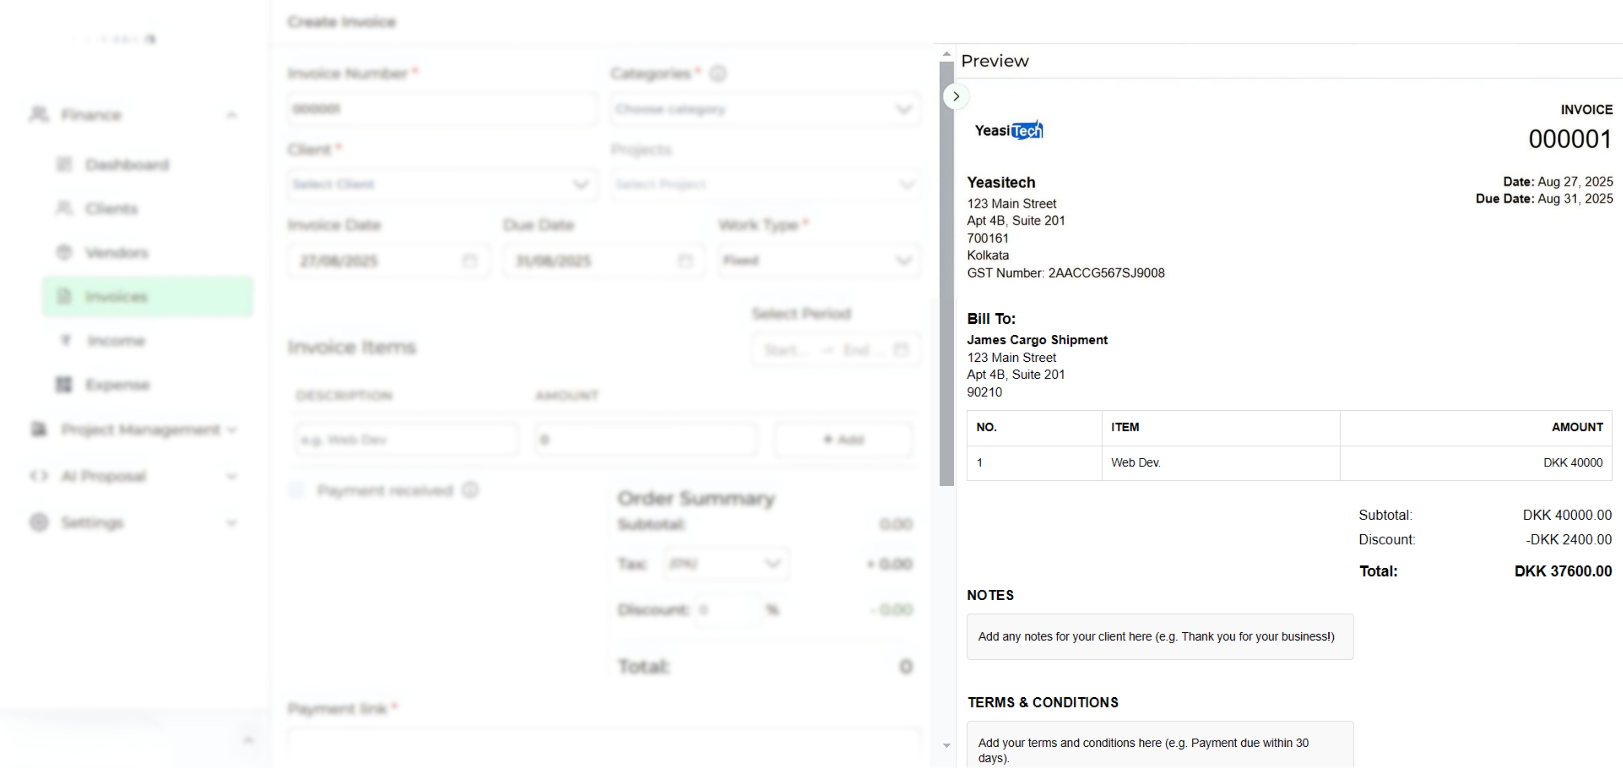
Step 4: Order Summary
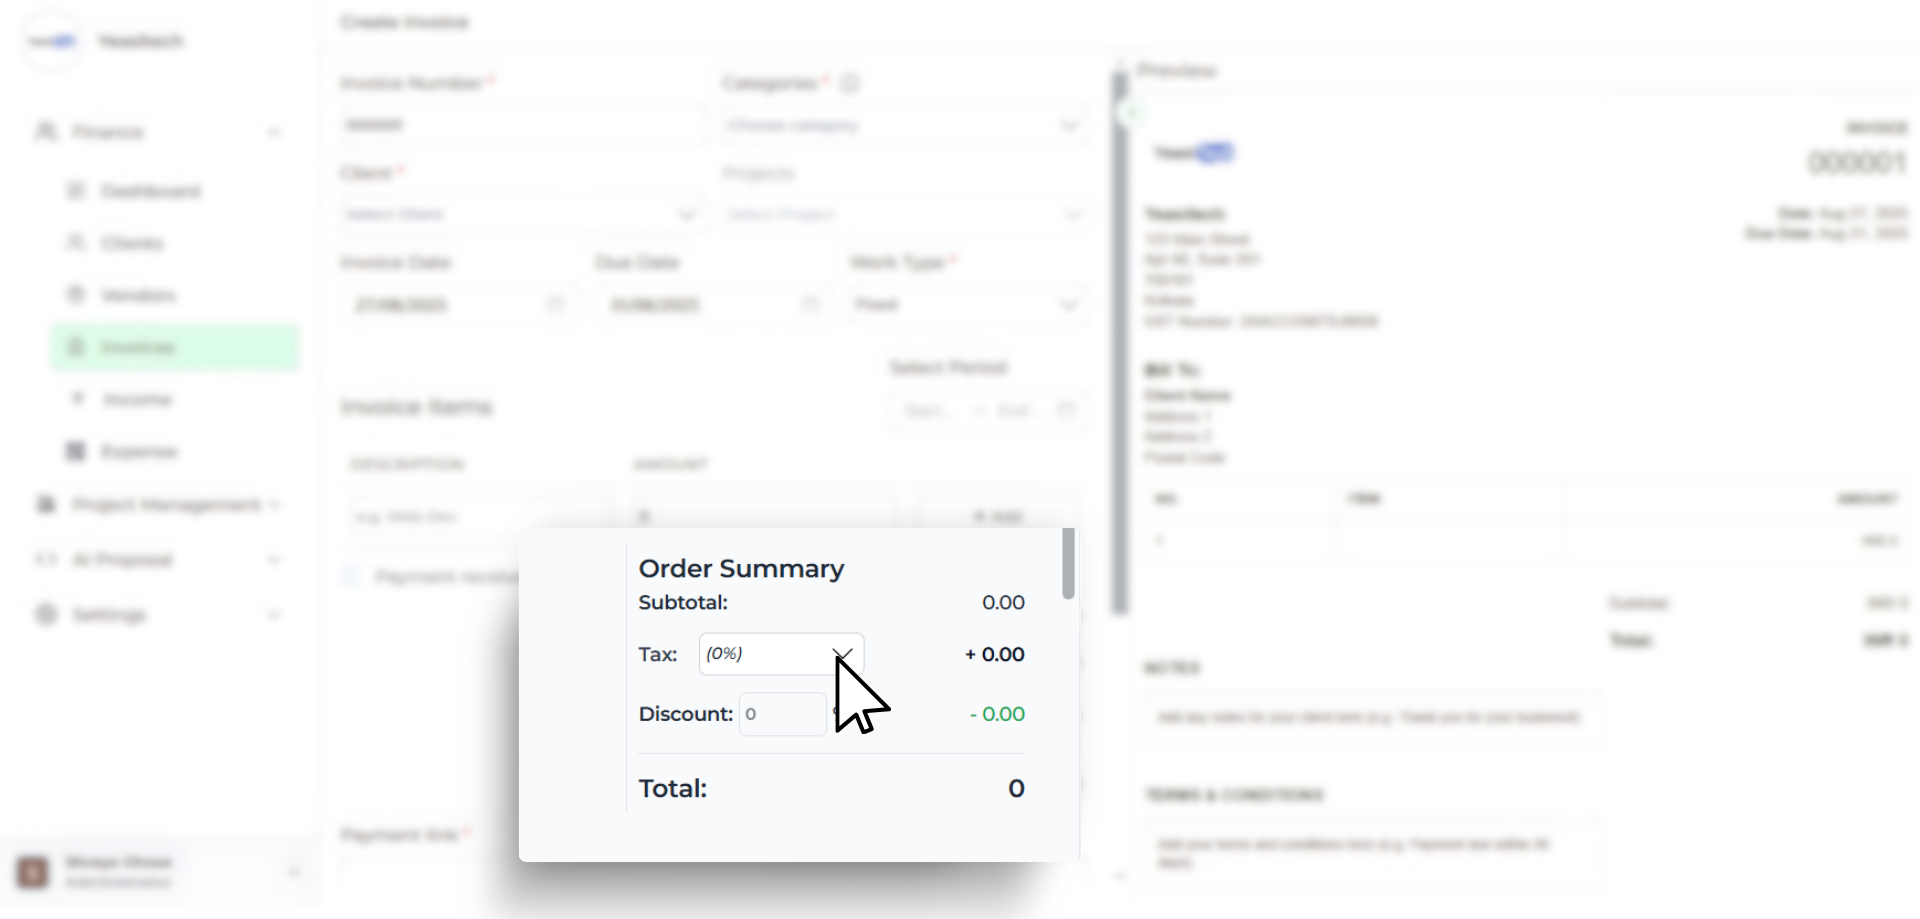
The right-hand preview updates in real time, showing:
- Subtotal – The total before any taxes or discounts.
- Tax (%) – Add GST, VAT, or which ever is applicable for your country tax.
- Discount (%) – Apply special rates or loyalty discounts.
- Total – The final amount your client owes.
Note: The Tax field is only enabled if tax has been configured. If your company has not set up tax details, this option will remain unclickable and won’t appear on the invoice.
Let me guide you on how you can set this up:
1. Go to Configuration

- From the left sidebar, click on Configuration.
- Under Workspace Configuration, select the Tax Rates tab.
2. Add a New Tax
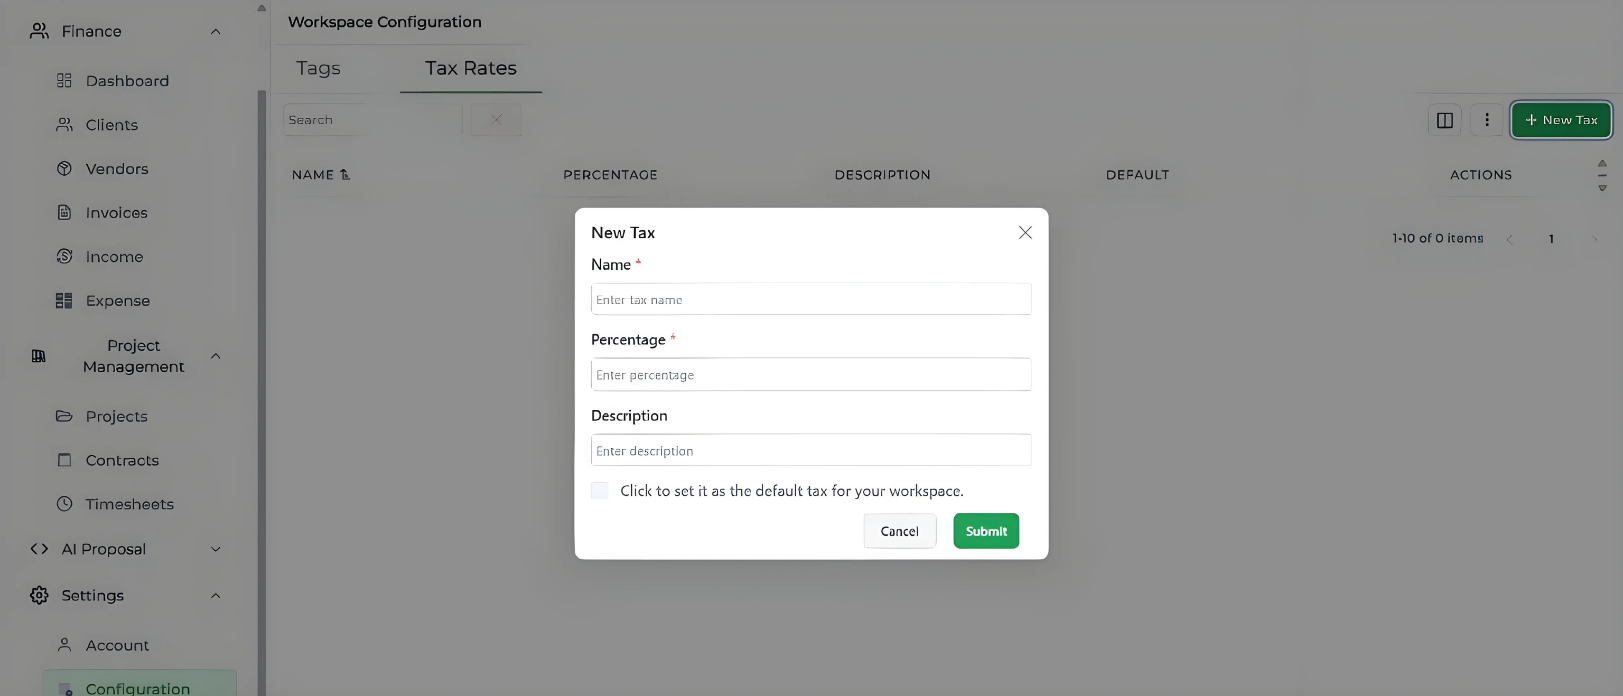
- Click the green + New Tax button on the top-right corner.
- A popup form will appear for entering the tax details.
3. Fill in the Tax Details
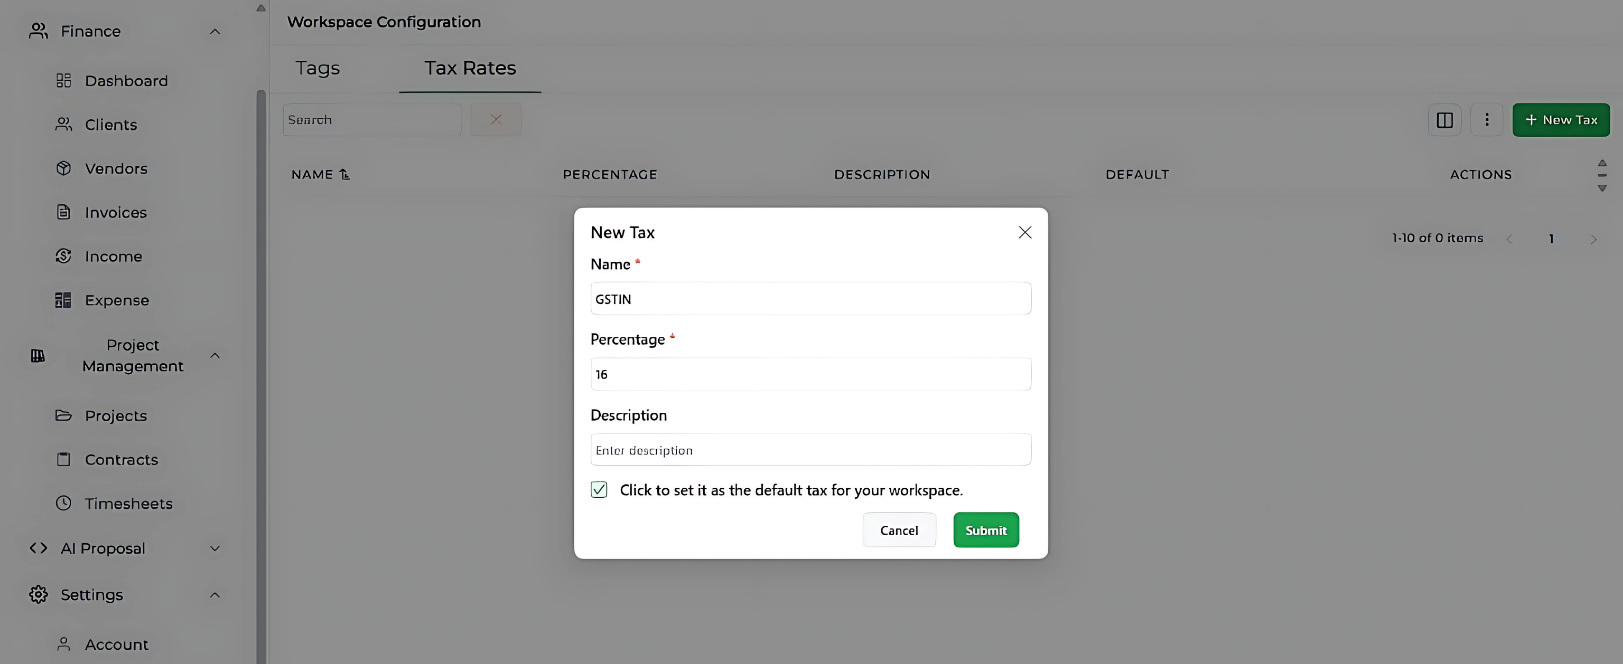
- Name: Enter the name of the tax (e.g., GSTIN).
- Percentage: Enter the tax rate (e.g., 16).
- Description: Add a description for clarity.
- You can also tick the box to set it as the default tax for your workspace.
4. Save the Tax
- Once all details are filled in, click Submit.
- The new tax rate will now appear in your Tax Rates list.
Everything updates instantly as you make changes—so your client always sees the exact, correct amount before you send the invoice.
Step 5: Payment & Notes
When it comes to getting paid, Tymora gives you flexibility:
- Direct Payment Link – If your company has set up online payment methods, you’ll see an option to add a payment link right inside your invoice. This lets your client click, pay instantly, and you get notified without sharing extra details.
- Notes Section – Use this space to add a friendly thank-you note, a short description of the work, or even your bank account details for clients who prefer traditional transfers.
- Terms & Conditions – Clearly mention your payment terms, due dates, late fees, or refund policies so there’s no room for confusion later.
You can also send the invoice directly from this step by clicking on Send invoices.
Step 6: Set Overdue Payment Reminders
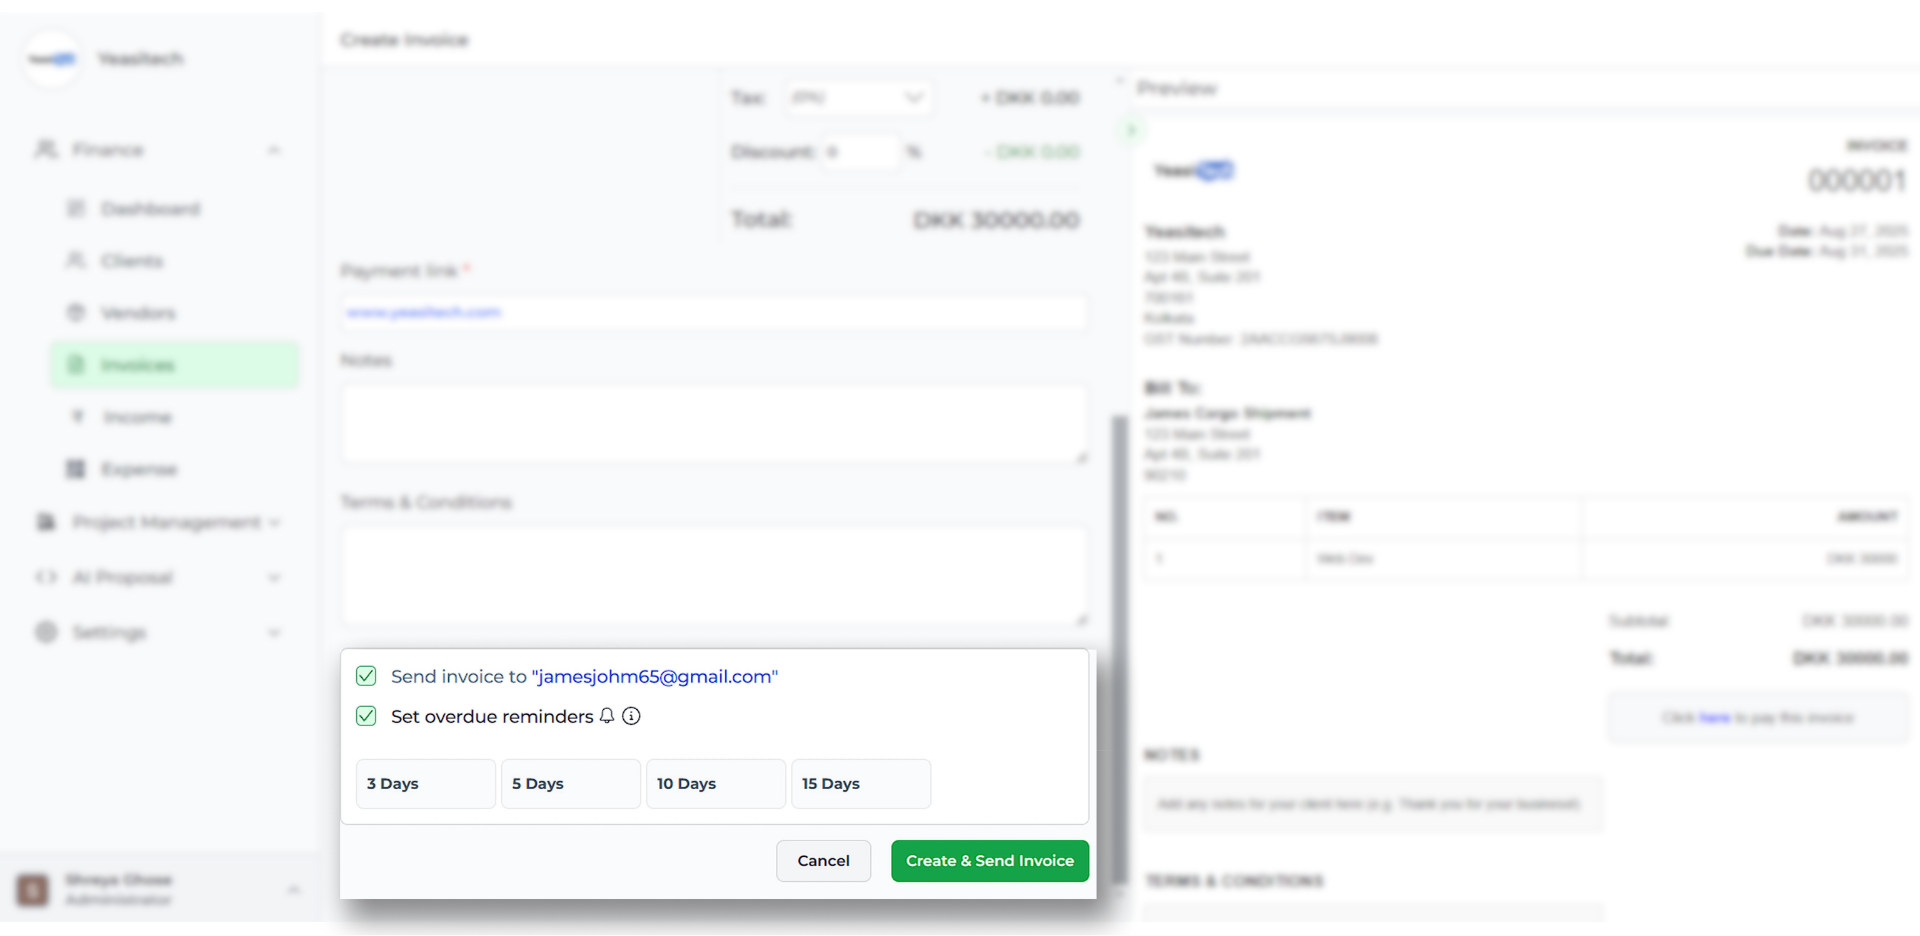
One of Tymora’s most unique and powerful features is the ability to manually set overdue payment reminders. This isn’t something you’ll find in every invoicing tool—and it’s a real game-changer.
Here’s how it works:
- Open your invoice and check the “Set overdue reminders” option.
- Select when you want the reminder to be sent—3, 5, 10, or 15 days after the due date.
- Tymora will then automatically notify your client based on your chosen schedule.
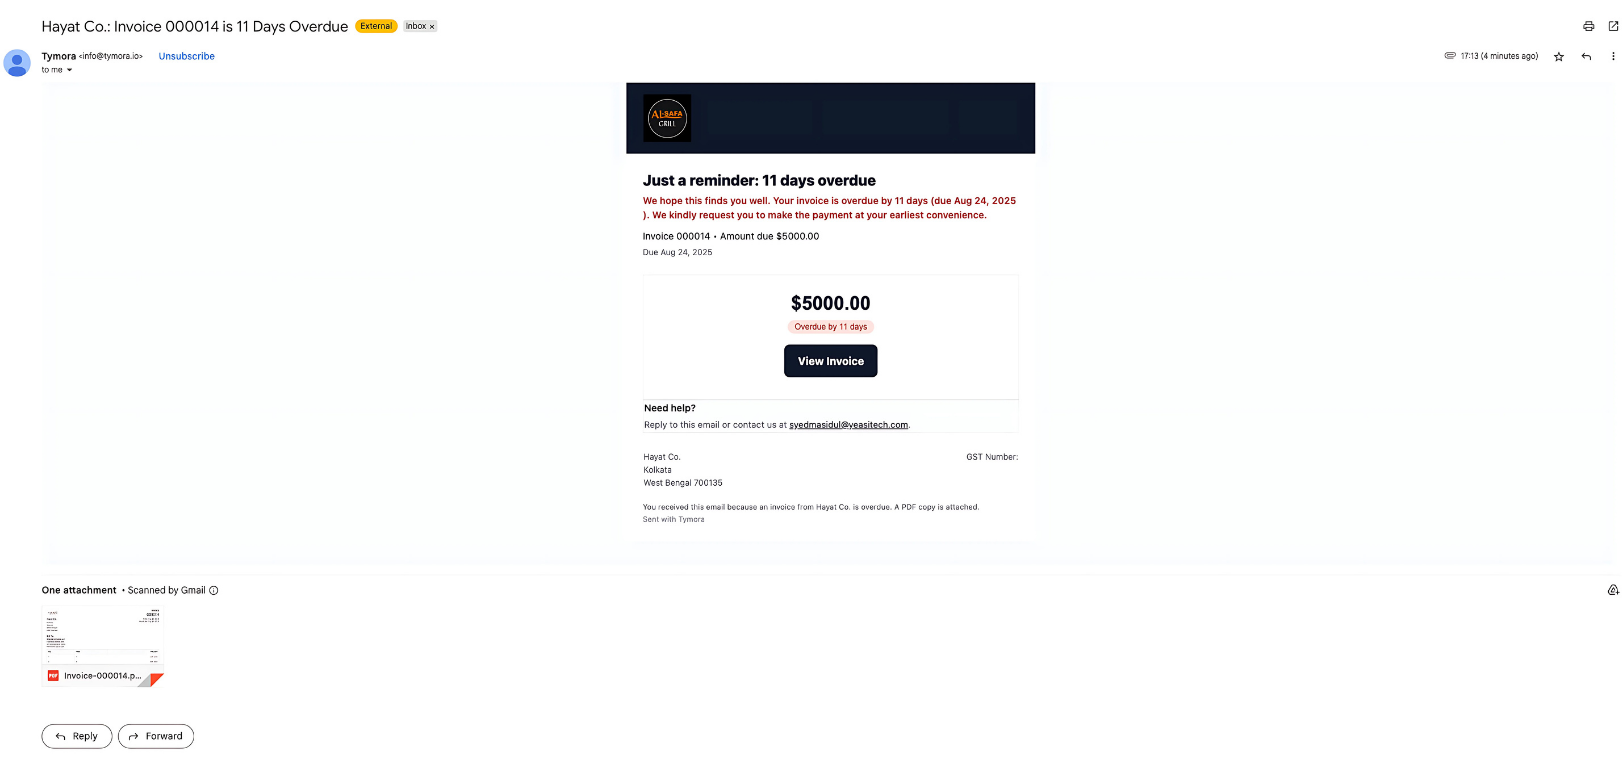
Instead of chasing clients or worrying about missed payments, Tymora does the follow-up for you. This feature helps you reduce hassle, maintain smoother cash flow, and keep every payment on track.
This reminder system is what truly sets Tymora apart, making your invoicing smarter and more effortl
Step 7: Send the Invoice
When your invoice is ready, Tymora gives you two seamless options:
- Send directly from Tymora via email (fast, clean, mobile-friendly)
- Download as PDF and send manually if you prefer
This means your client gets a clean, mobile-friendly invoice without formatting issues or file compatibility problems — the kind of small detail that can make a big difference in payment speed.
Forgot to Send Earlier? No Problem. If you forgot to send your invoice in Step 5, Tymora has you covered. You can still send it from Step 8 — giving you complete flexibility and peace of mind.
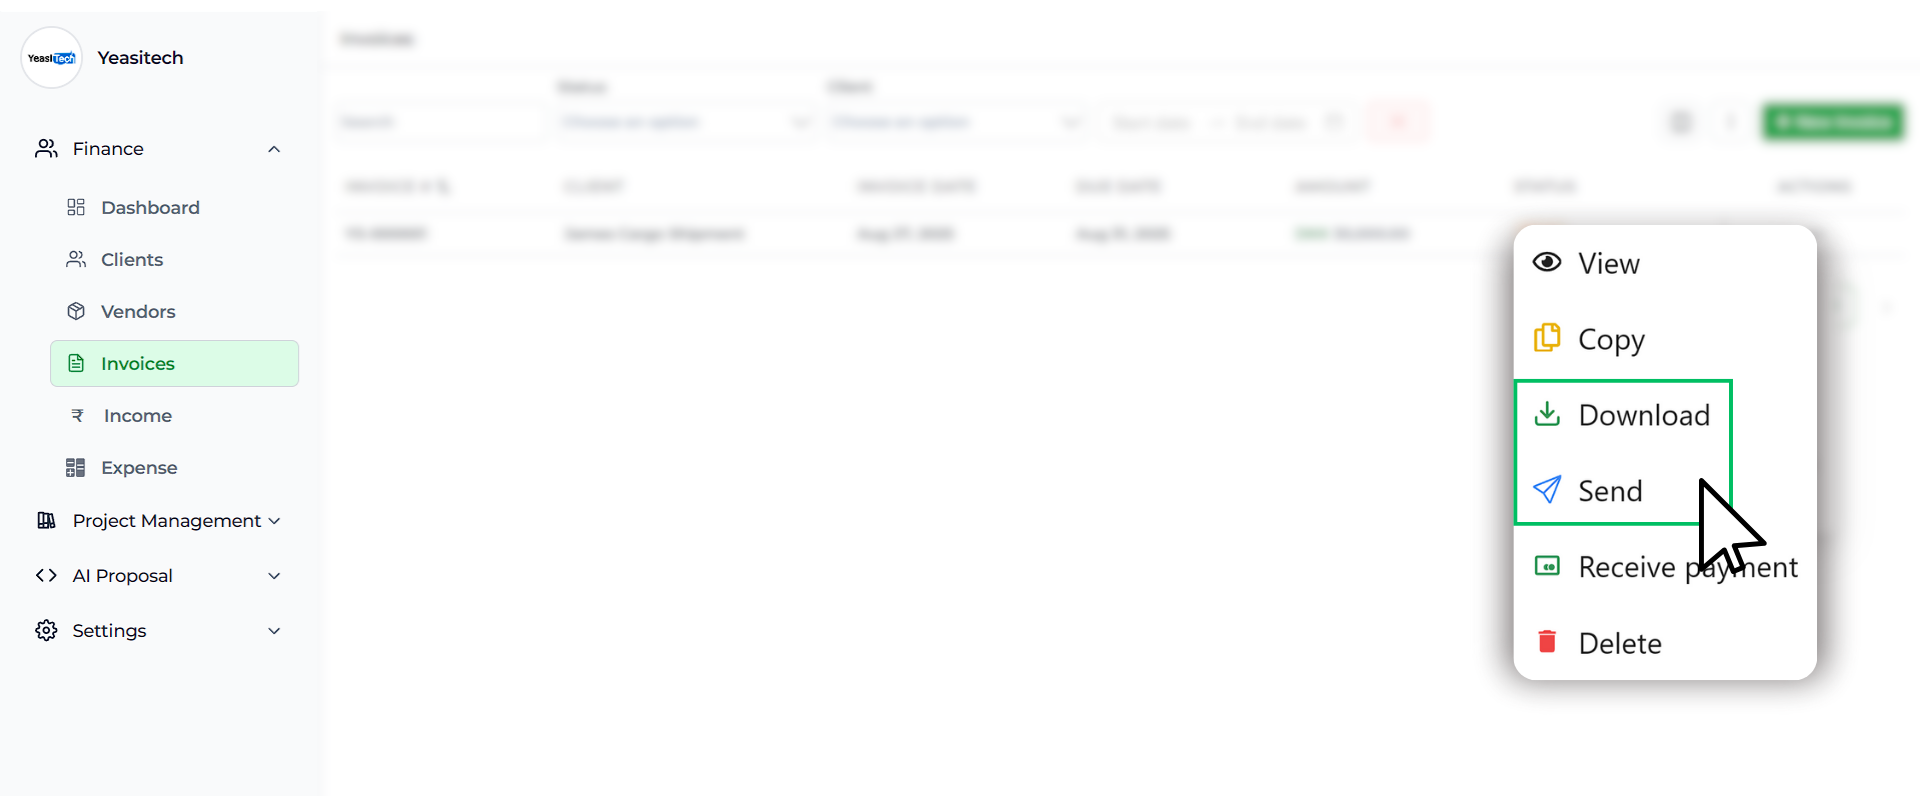
Step 8: Receive Payments
Whenever you see an invoice marked as Due or Overdue, you can immediately record the payment once your client pays. To do this:
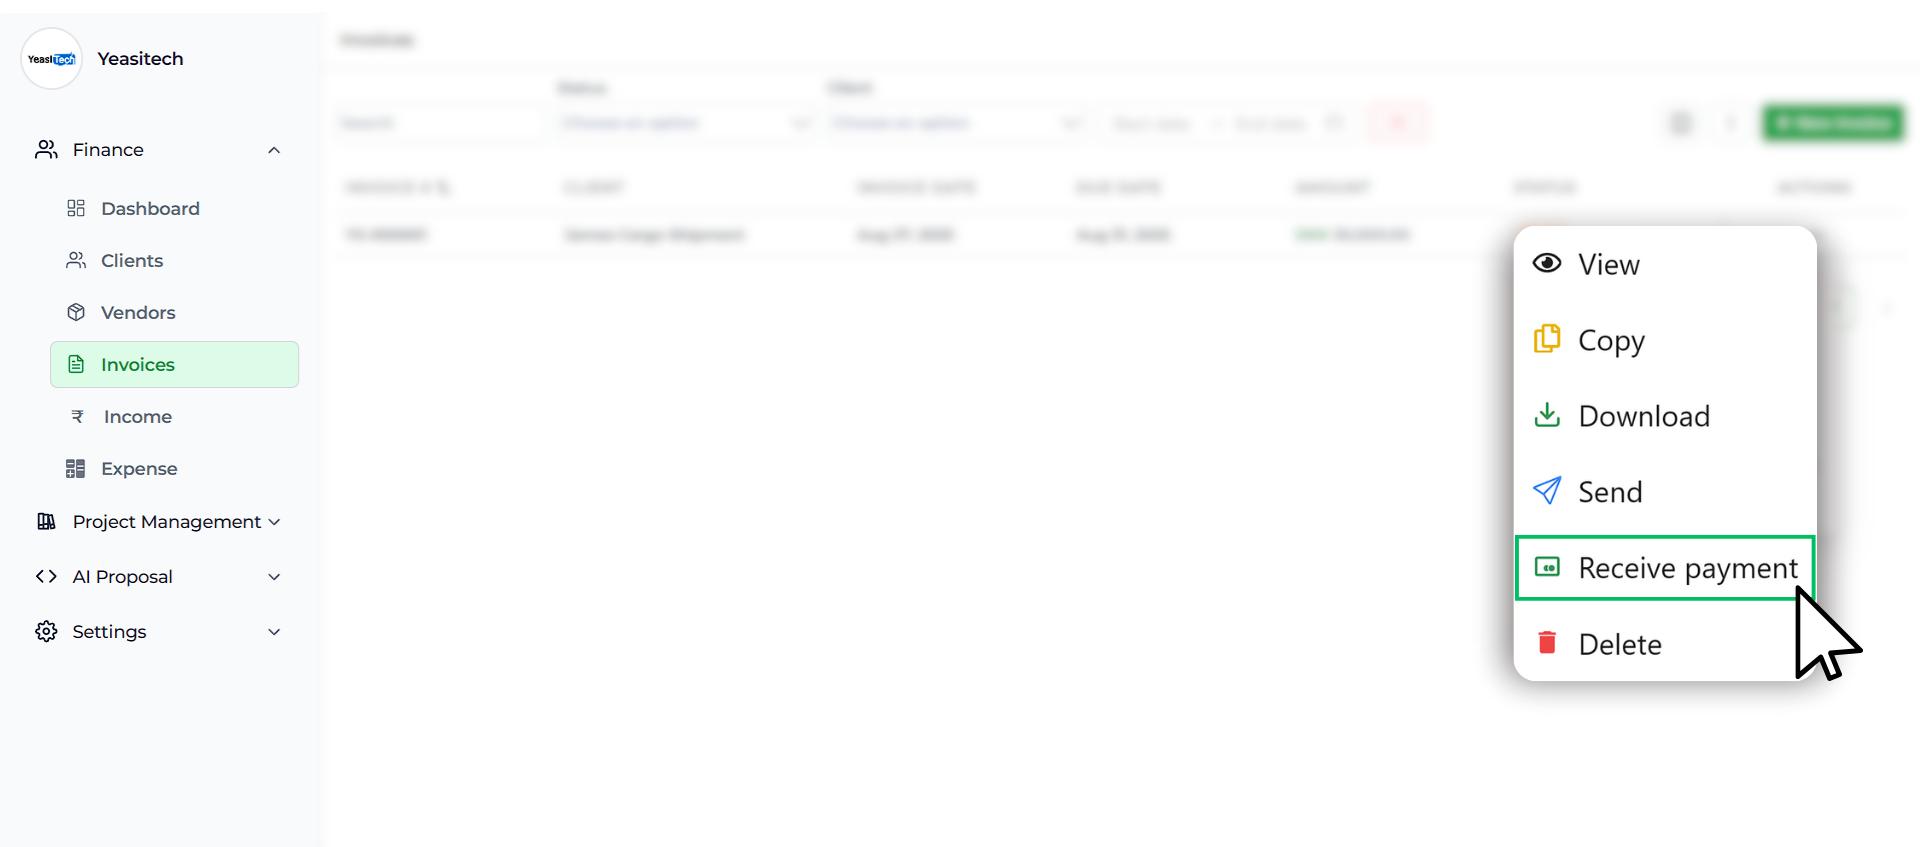
- Click the three-dot menu next to the invoice.
- Select Receive Payment
- Fill in the payment form:
- Received Date – Enter when the payment was made.
- Payment Mode – Choose how it was paid (cash, UPI, card, bank transfer, etc.).
- Amount & Currency – Enter the exact amount received and choose the appropriate currency.
- Upload Document – Attach proof of payment such as a receipt, bank confirmation, or even a FIRA document for international transactions.
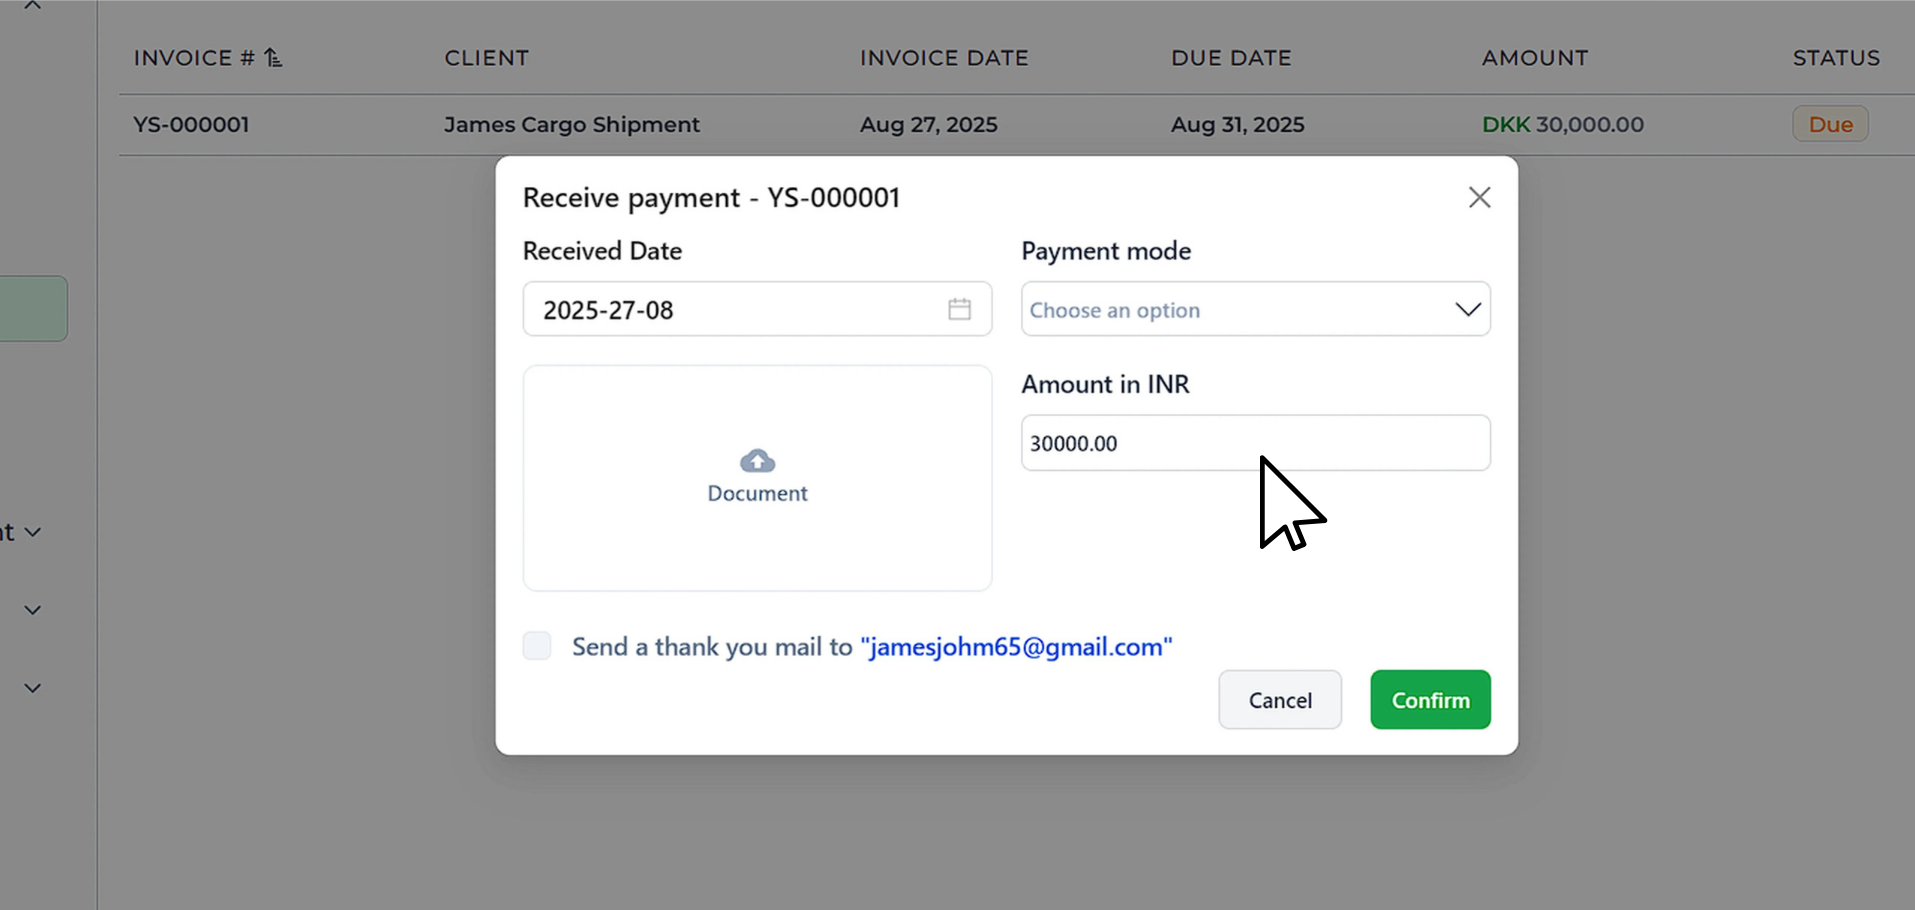
Step 9: Send Thank You Emails
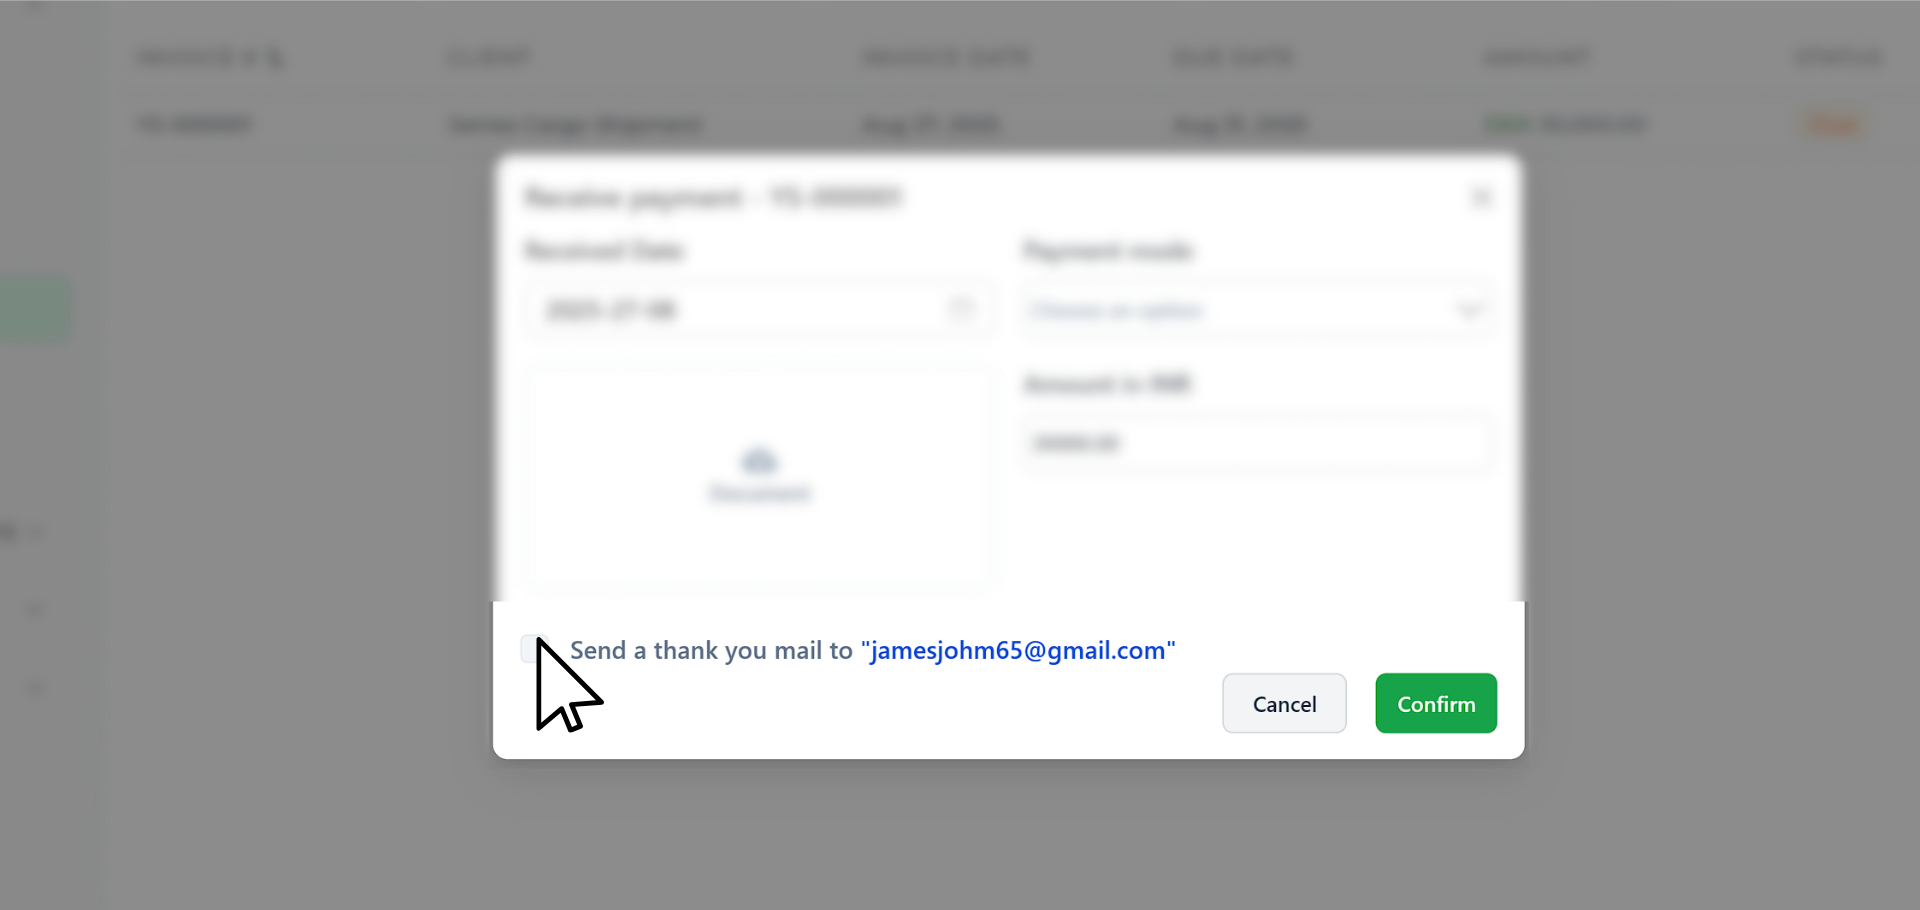
Before saving, you’ll see an option to send an automatic thank-you email:
- Toggle it on if you want Tymora to send a quick appreciation note.
- Skip it if you prefer not to.
Here’s how your thankyou emails look like:
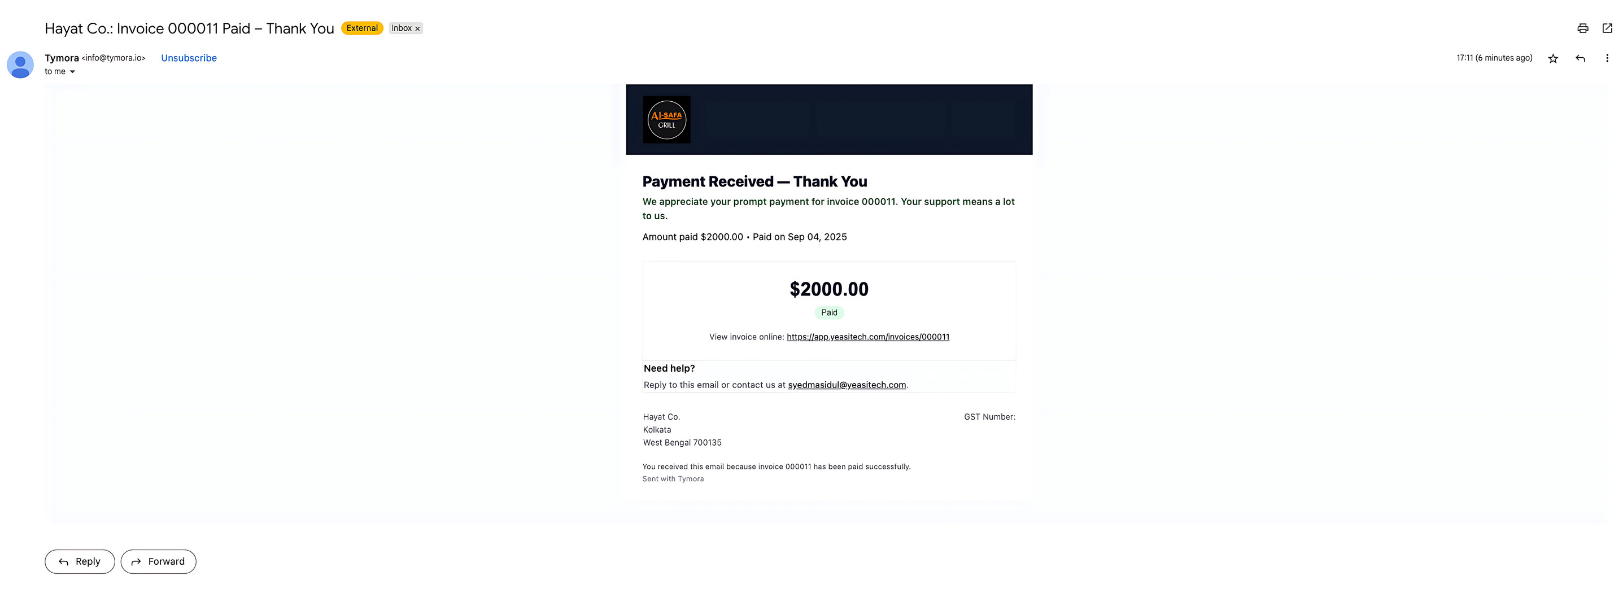
A simple thank-you builds trust and keeps your clients happy. Tymora can automatically send a personalized thank-you email once payment is received.
Step 10: View Invoice Activity with Timeline

Every invoice you create comes with an Activity Timeline on the right side. This shows a running history of everything that has happened with that invoice.
- When the invoice is created, it automatically appears in the timeline.
- If a payment is received, the exact amount and date are also listed here.
- If you forgot to set an overdue reminder earlier in Step 5, you can do it now from this section. You can choose to send reminders after 3, 5, or 10 days overdue, making sure clients don’t miss their due dates.
- You can quickly check the full journey of that invoice in one place — from creation to payment.
This gives you a clear snapshot of your invoice’s progress without needing to open multiple sections. Anytime you open an invoice, the timeline instantly shows the latest updates.
Step 11: View Invoice Details on Dashboard

Finally, you can head back to the Dashboard to get a quick snapshot of your invoices. Here, you’ll see the overall details, such as total invoices created, paid, or pending — all in one place. It’s a simple way to keep an eye on your invoice activities without opening each one individually.
What Makes Tymora Stand Out?
Here’s why Tymora is smarter than most invoicing tools:
- Manual Overdue Reminders – A unique feature that helps you follow up on time without awkward chases.
- Direct Payment Links – Clients can pay instantly, reducing delays.
- Flexible Payment Recording – Record amounts, currencies, and even upload proof like FIRA documents.
- Seamless Process – From creating to sending to payment, everything stays simple and professional.
With Tymora, invoicing is done once—and done right.
What's inside?
Categories
Customer Success Stories
See how agencies and freelancers are transforming their businesses with Tymora
Tymora has completely transformed how I manage my freelance business. From invoicing to tracking expenses, everything is streamlined and effortless.

Monowar Iqbal Layek
Freelancer
Managing my freelance work is so much easier with Tymora. Invoicing is fast, expense tracking is simple, and I feel more organized than ever.

Sandeep Acharya
Freelancer
Tymora made managing my freelance projects and finances seamless. The platform is intuitive, and support is always responsive and helpful.

Samsur Rahaman
Automation Framework Architect