How to File Taxes for Your Income and Expenses With Tymora

Income, expenses, and taxes feel like piecing together a puzzle of crumpled receipts, mismatched spreadsheets, and endless back-and-forth emails with your accountant. You’re not alone.
In fact, small businesses often spend dozens of hours every year manually preparing records for tax filing. The good news? Tymora makes it simple by recording every dollar earned and spent in one place — so when it’s time to file taxes, everything you need is already organized, accurate, and ready to go.
Here’s how Tymora can help you track, review, and prepare for tax filing.
Table of Contents
How Do I Add Expenses in Tymora?
If you’re a Tymora user with access to the Finance module, you can easily record and manage expenses for your business. This feature is automatically available for you to use — no extra setup required.
For an in-depth look, we’ve outlined the steps below.
Don’t have access to the Finance module yet? Learn more about enabling it in your workspace settings.
Step 1: Add the vendor
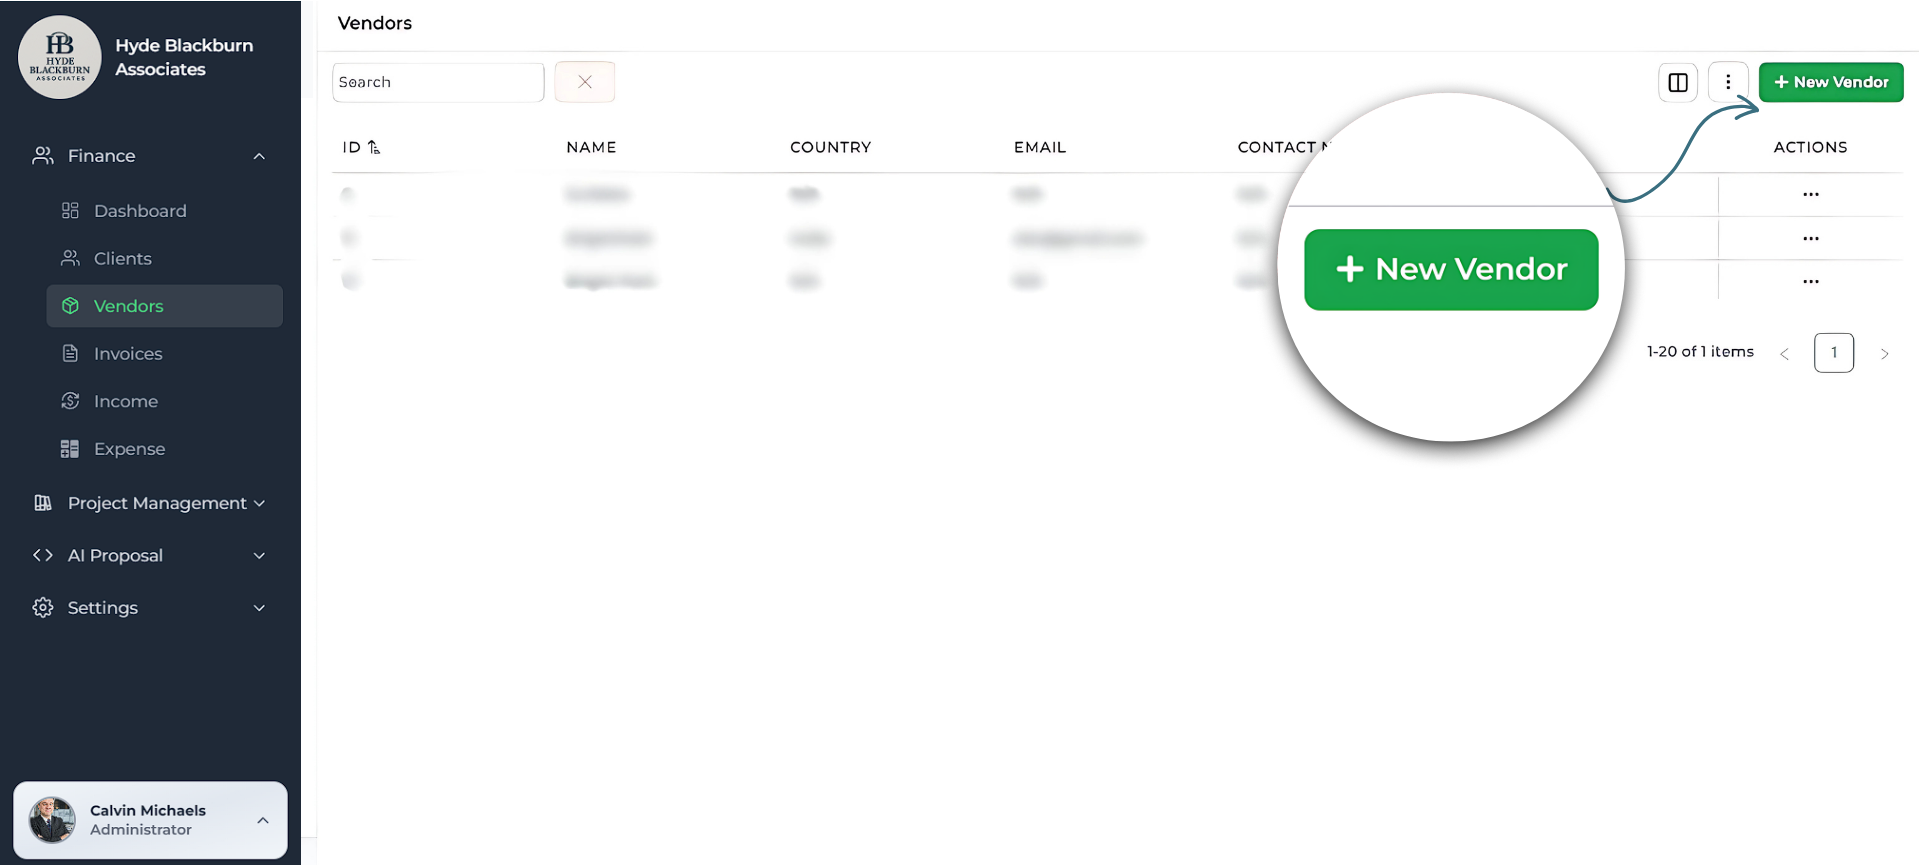
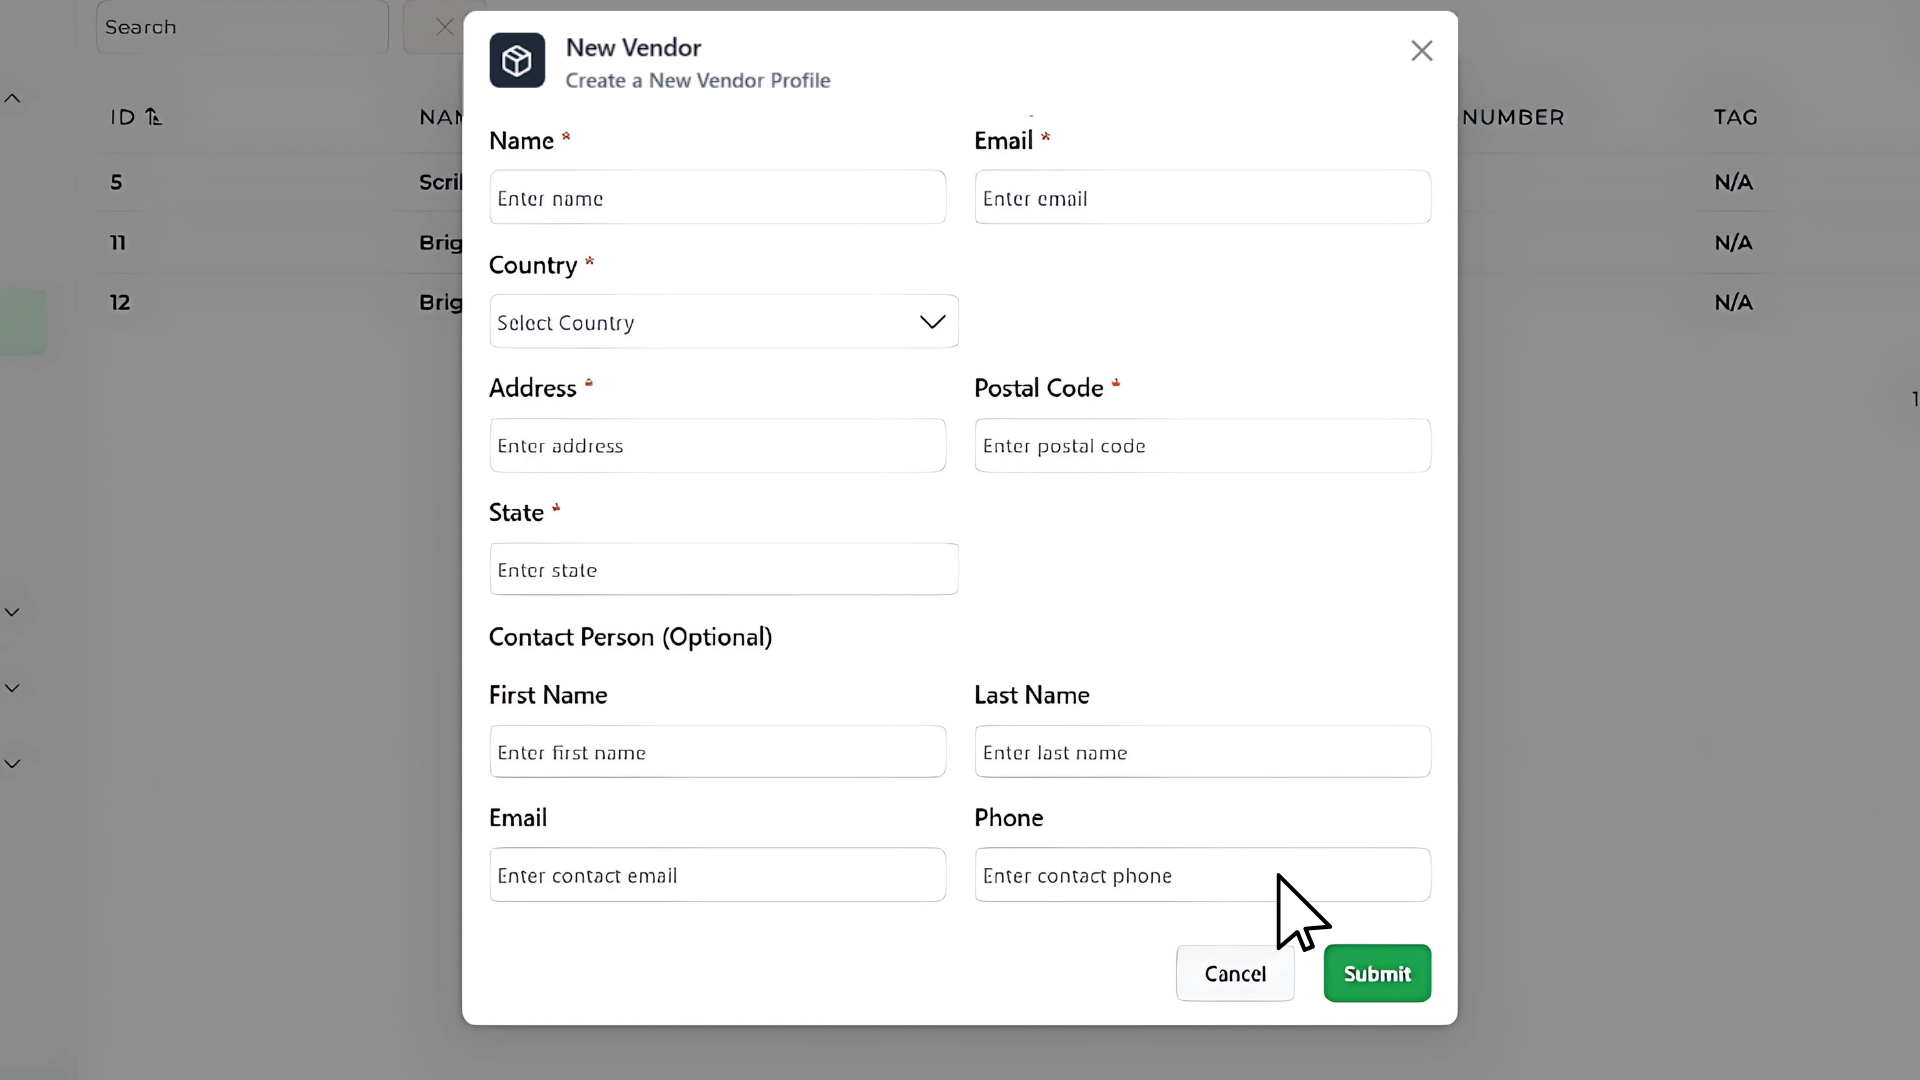
Before creating any invoice, you’ll need to add your Vendors details.
- Go to Finance → Vendors.
- Click + New Vendor in the top-right corner.
- Enter the vendor name and other details if available — such as country, email, phone, or tags.
- Click Save.
If the vendor is already in your list, you can skip this and just select them when adding an expense.
Step 2: Create a new expense
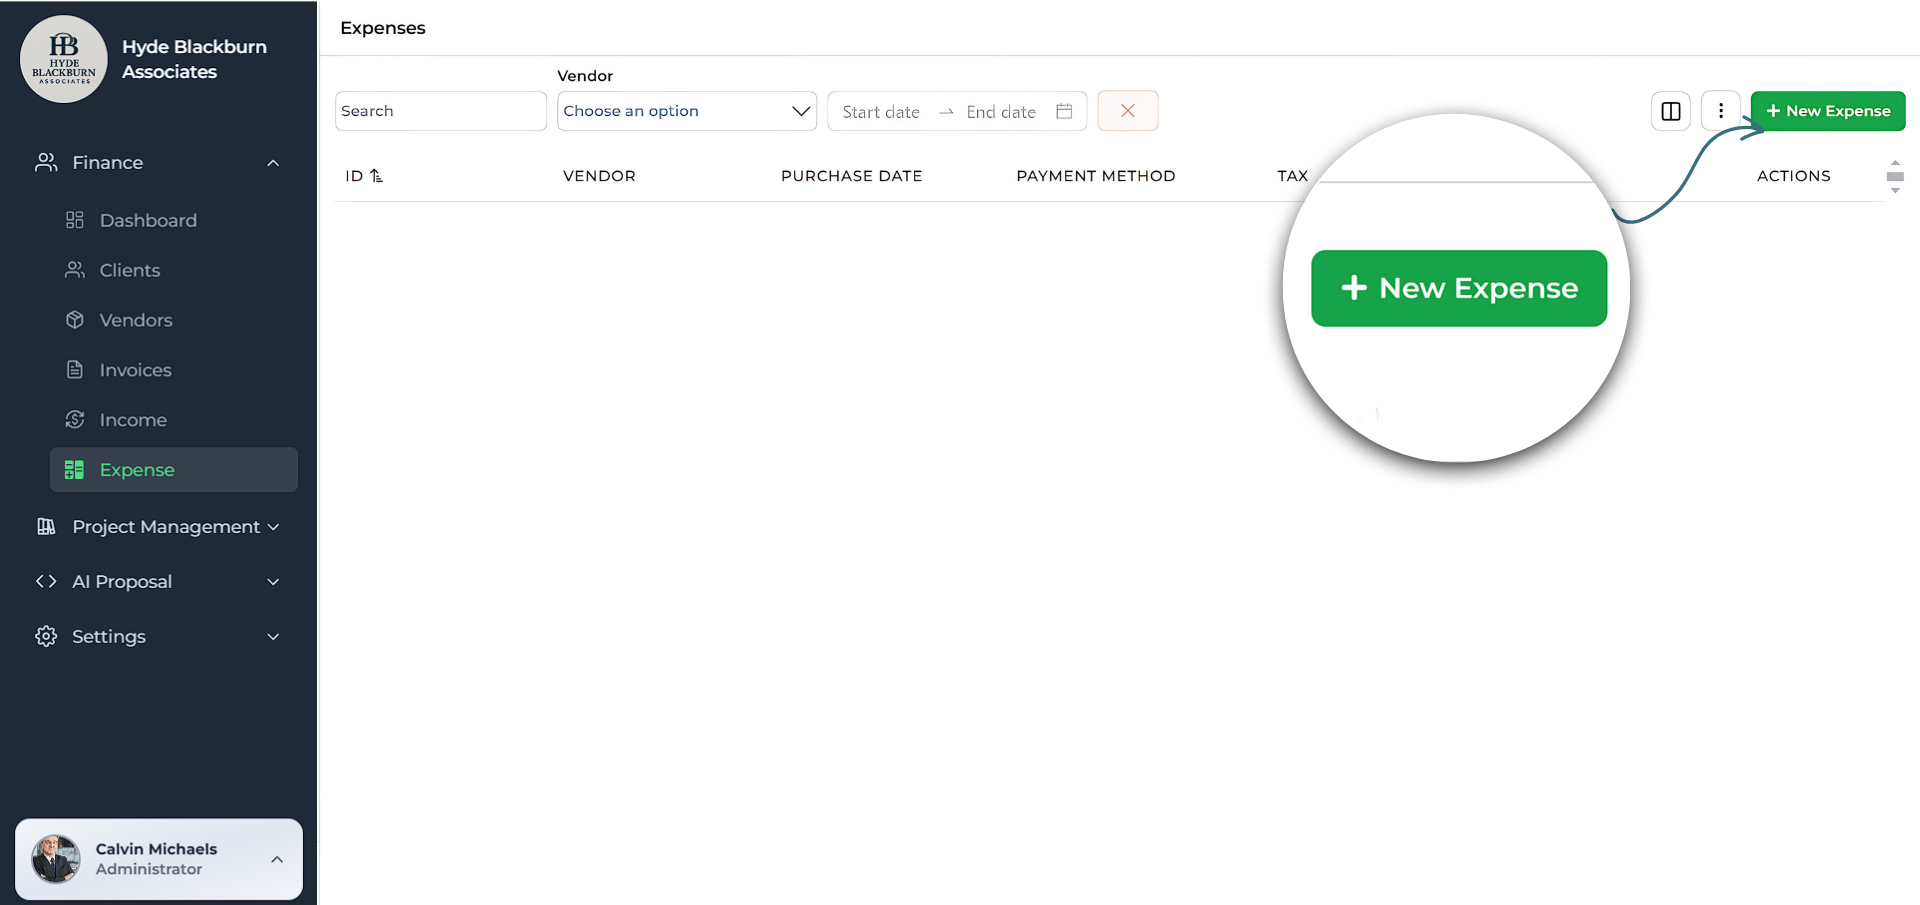
- Go to Finance → Expense.
- Click the green + New Expense button in the top-right corner.
This will open the Add expense popup where you’ll enter all expense details
Step 3: Choose an expense category
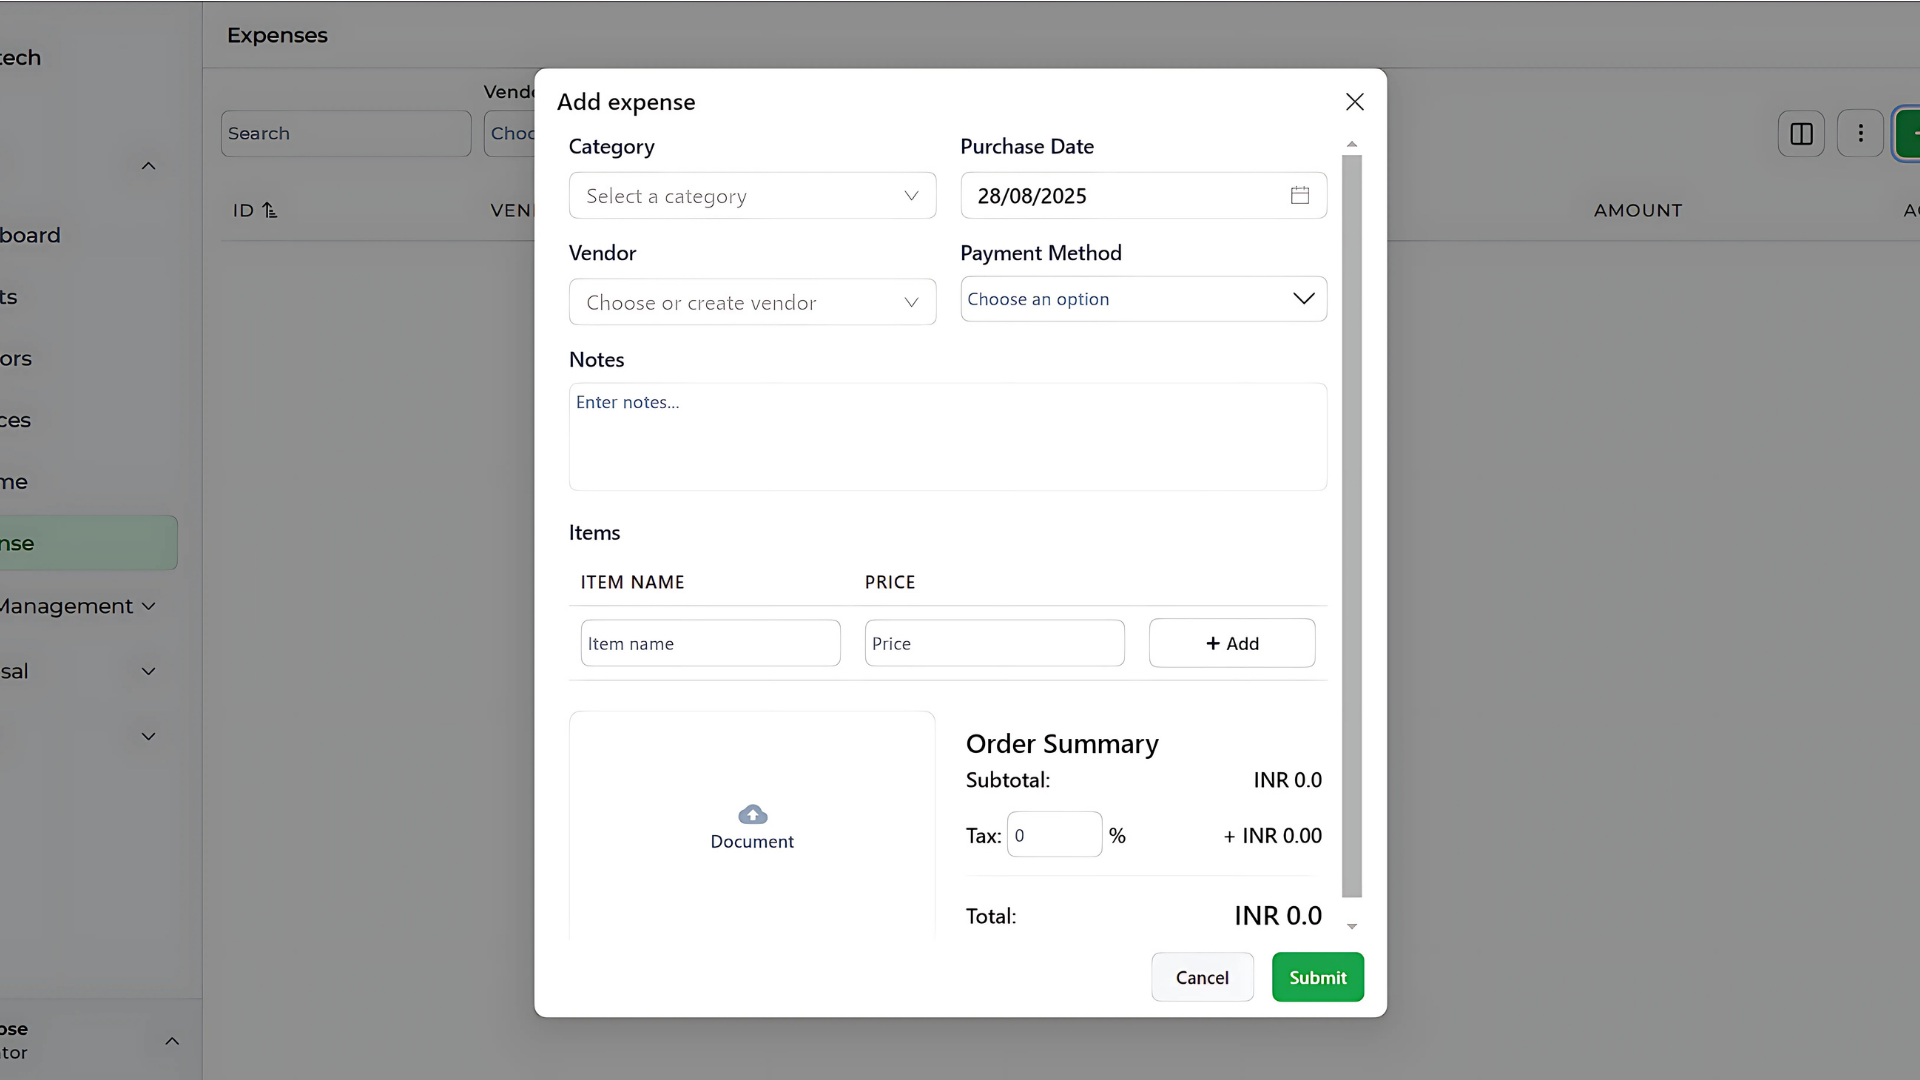
From the Category dropdown, select the type of expense. This helps keep your reporting organized.
Examples include:
- Personnel
- Technology
- Sales and Marketing
- Operations
- Cost of Good Solds
- General and Administrative
Tip: Choosing the correct category makes financial reports more accurate and useful.
Step 4: Select the purchase date
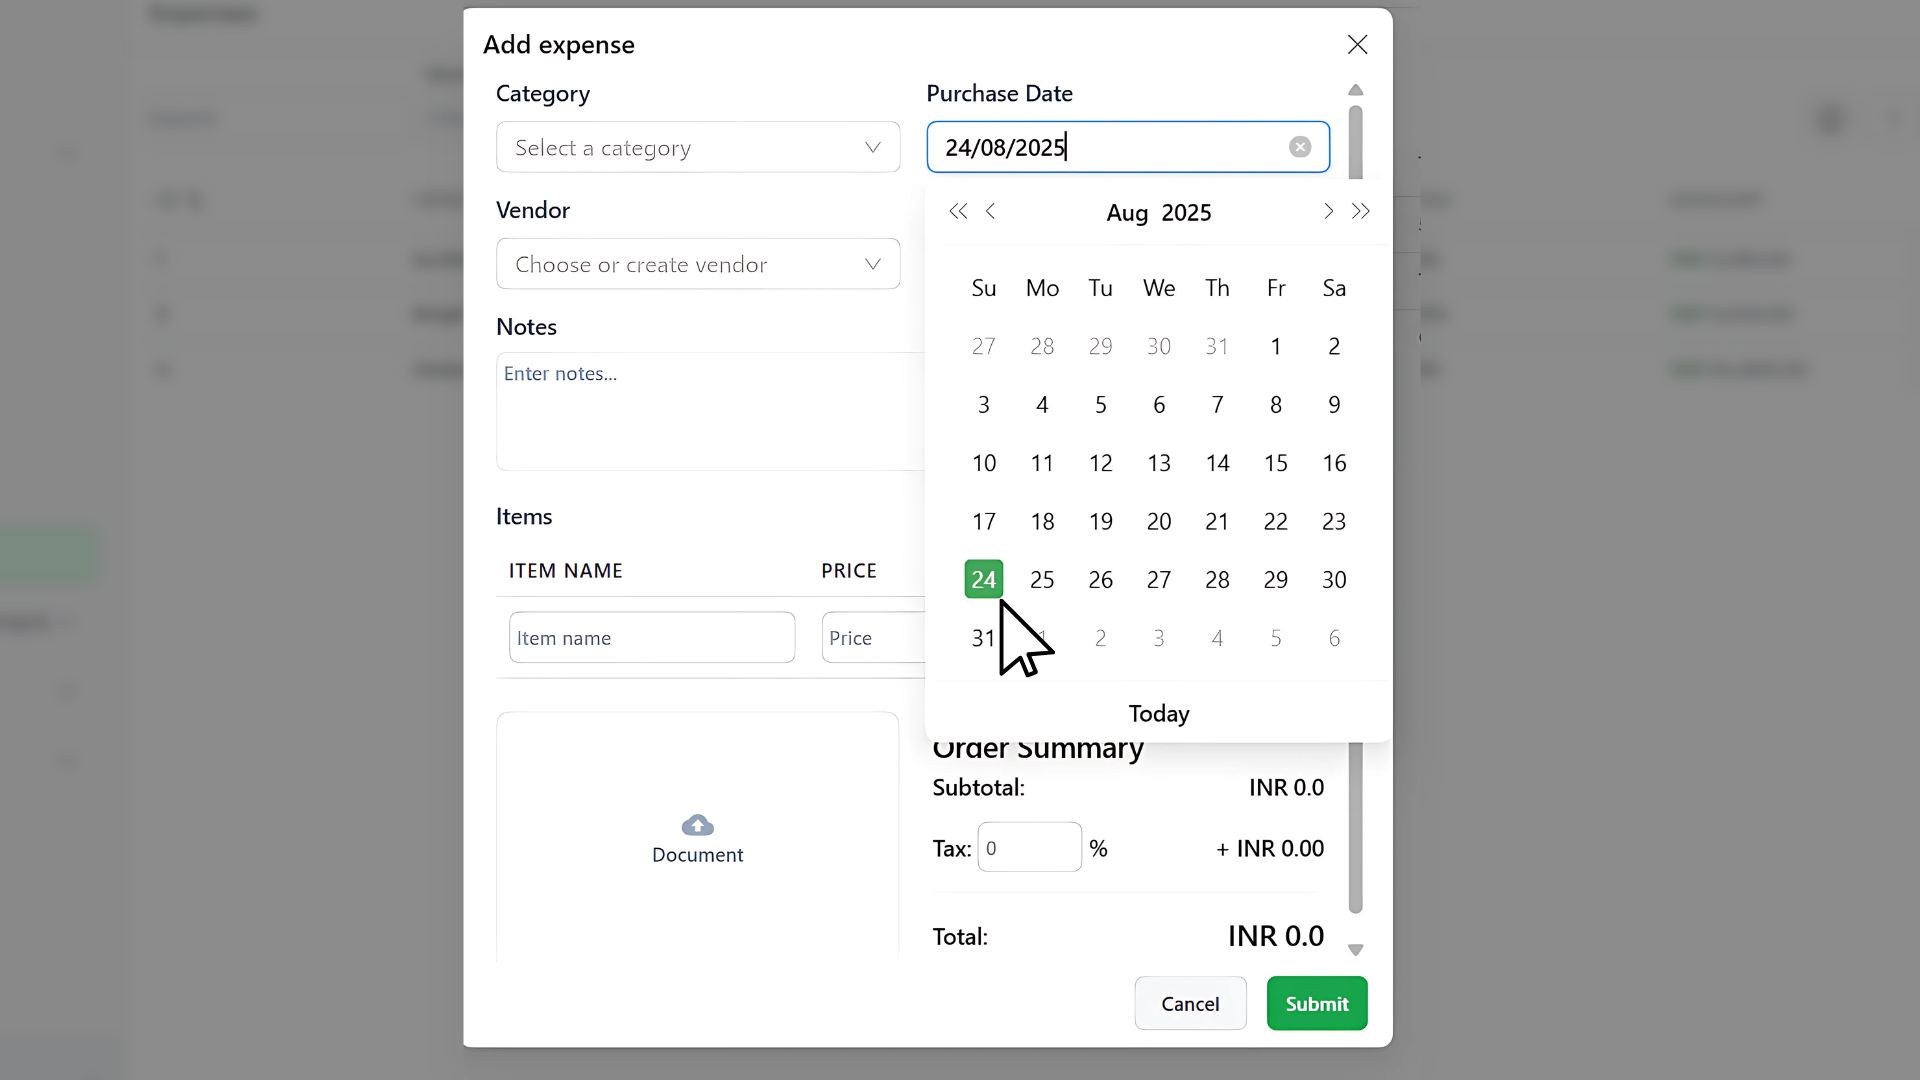
Use the date picker to choose the day the purchase happened. This ensures your expense appears in the right month/period for accounting.
Step 5: Select the vendor
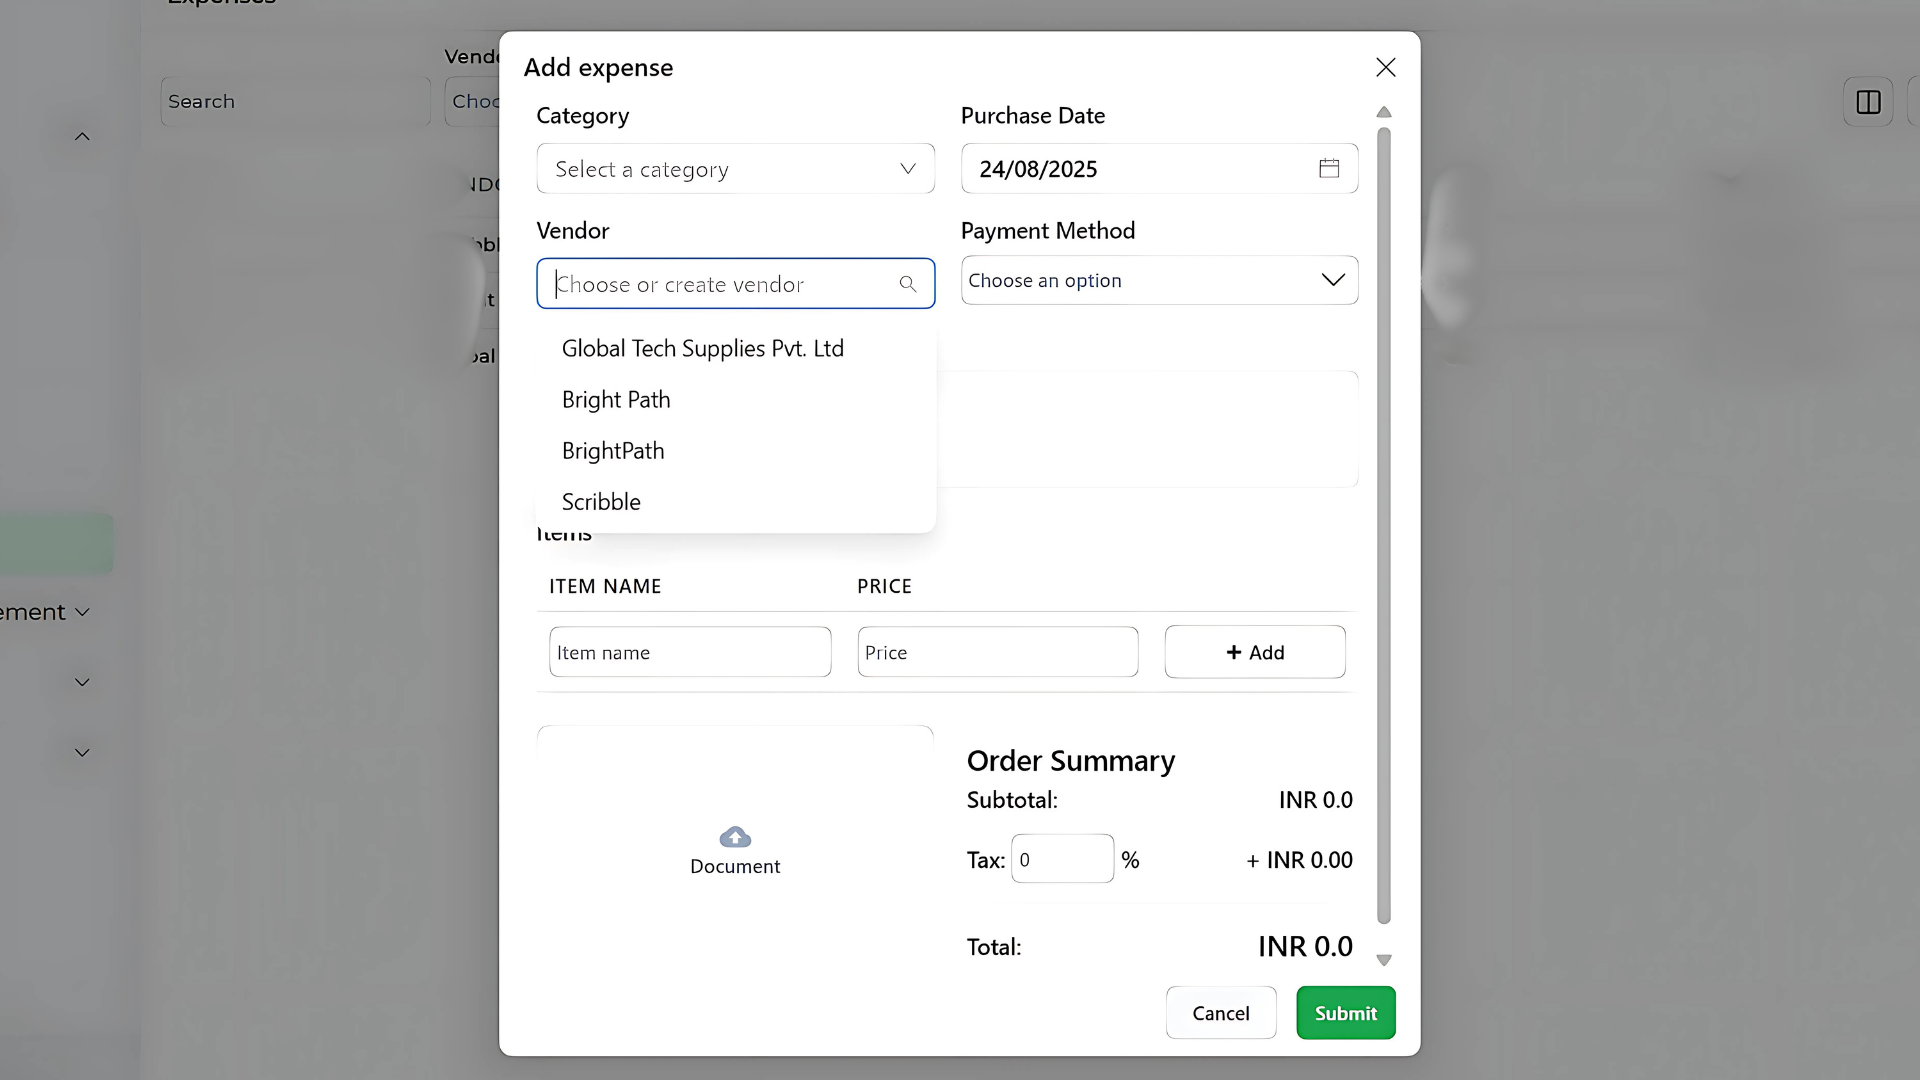
In the Vendor field, start typing the vendor’s name.
- If the vendor exists, click to select them.
- If they don’t exist yet, you can create a new one right here.
Step 6: Add payment method
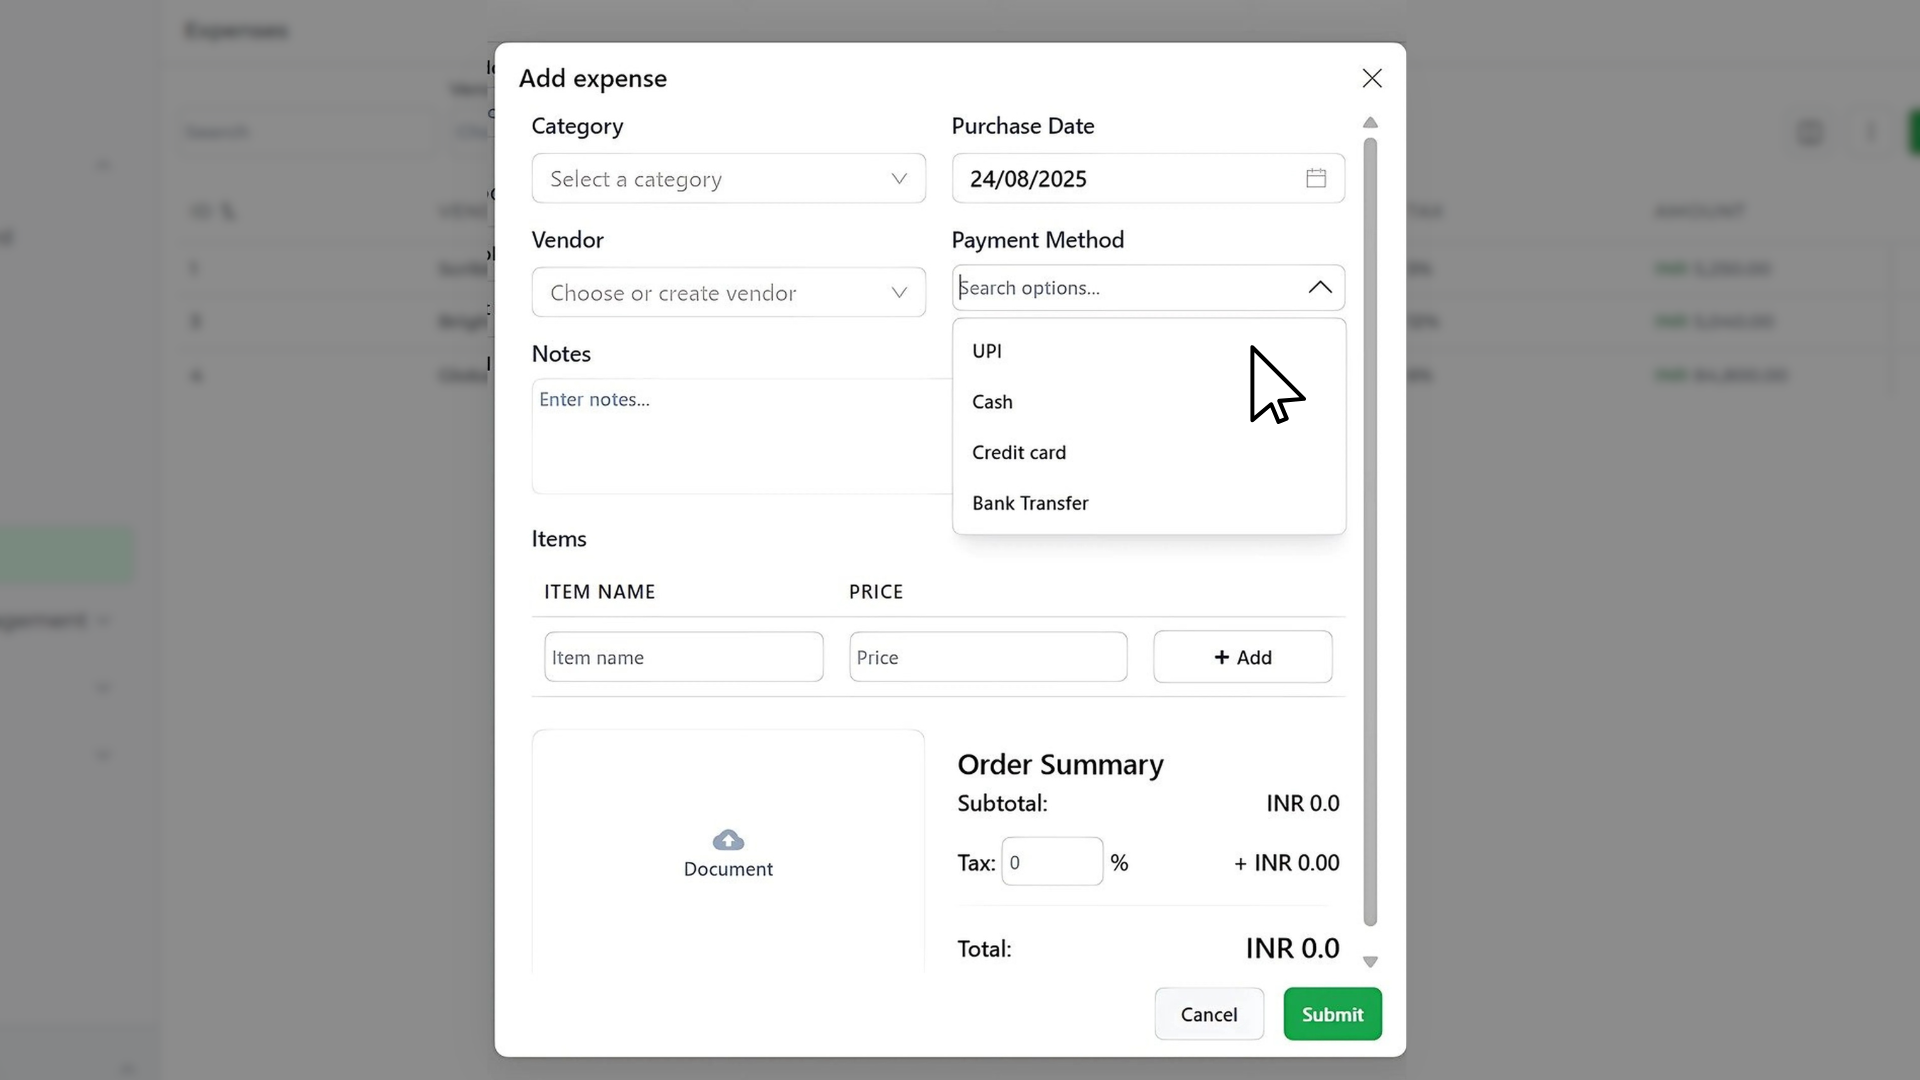
Select how you paid:
- Cash
- UPI
- Bank Transfer
- Credit Card
- Other available methods
This helps with payment tracking later.
Step 7: Add items

Under the Items section:
- Type an item name.
- Enter the price.
- Click + Add for multiple items in one expense.
Tip: Use clear item names for better future reference.
Step 8: Attach supporting documents
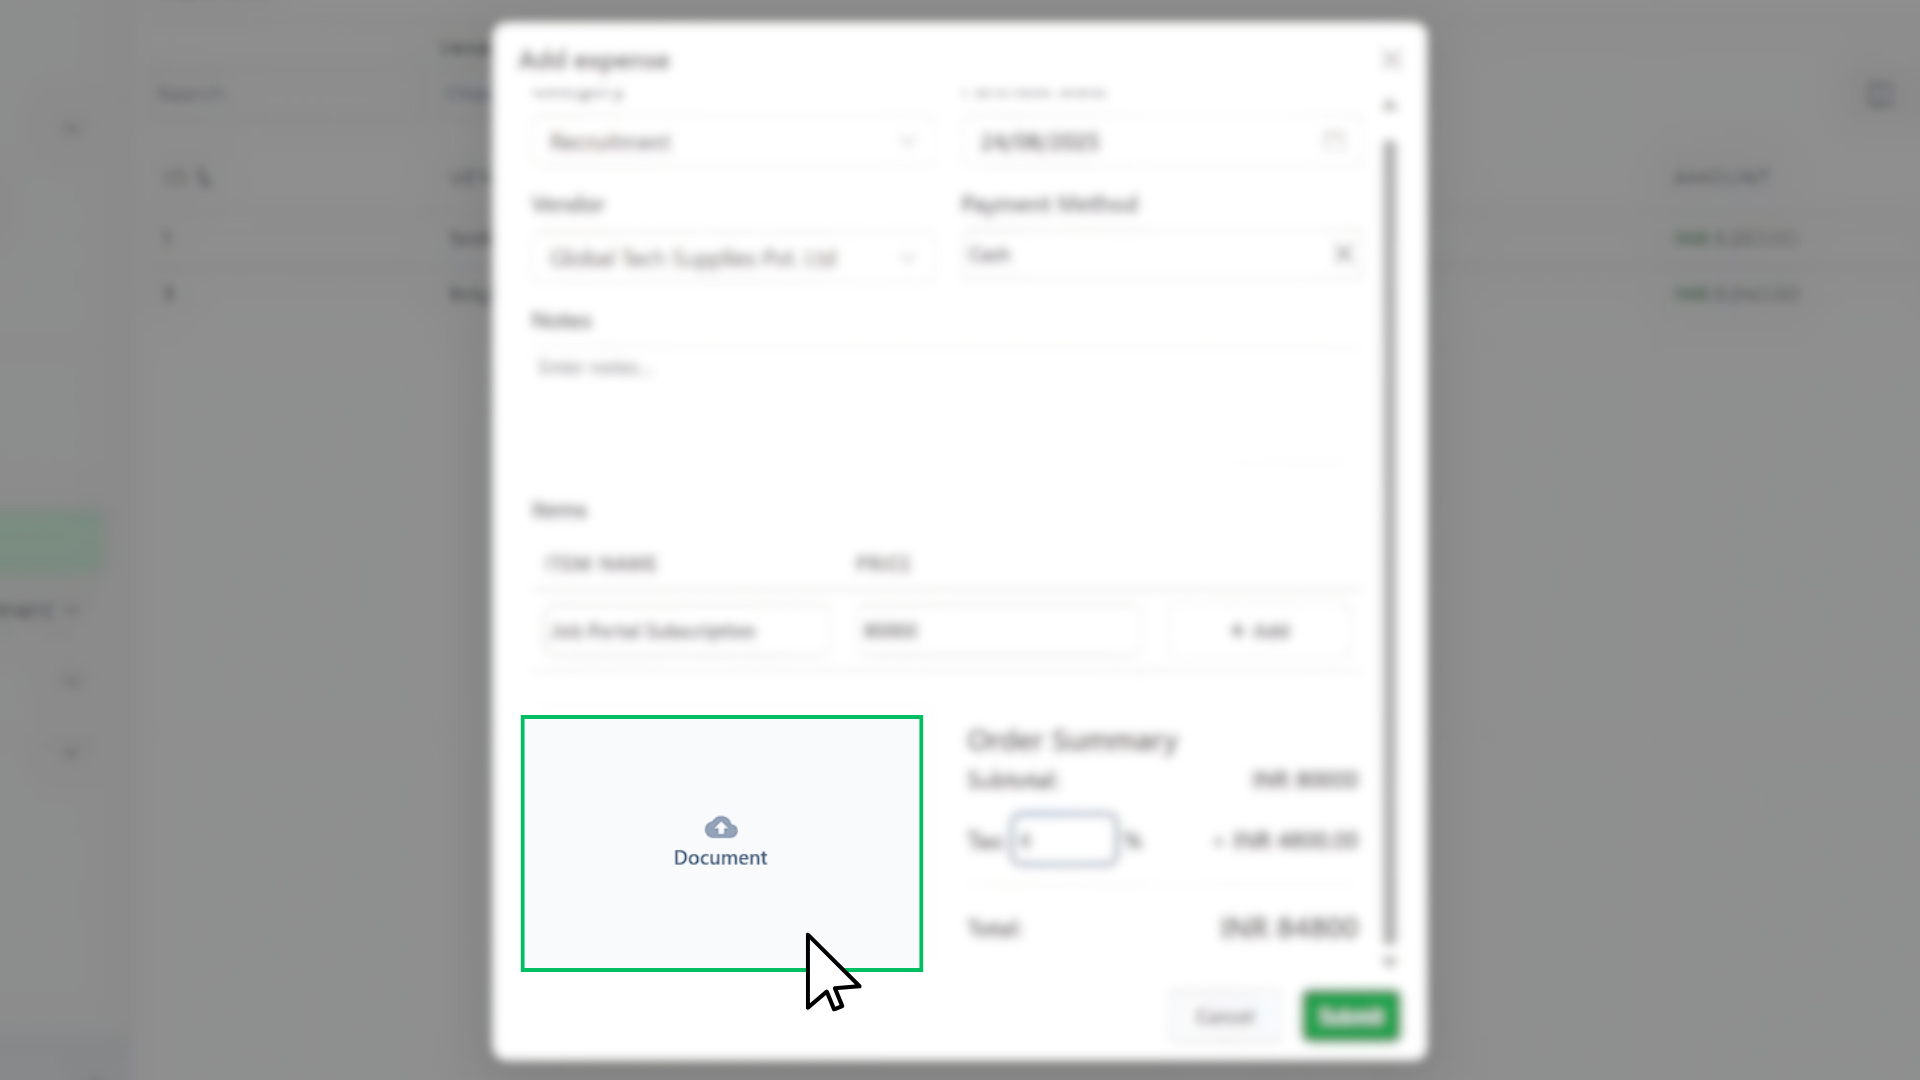
Upload receipts, invoices, or payment proofs by clicking the Document upload area. This keeps all your expense records stored safely in one place.
Step 9: Apply tax
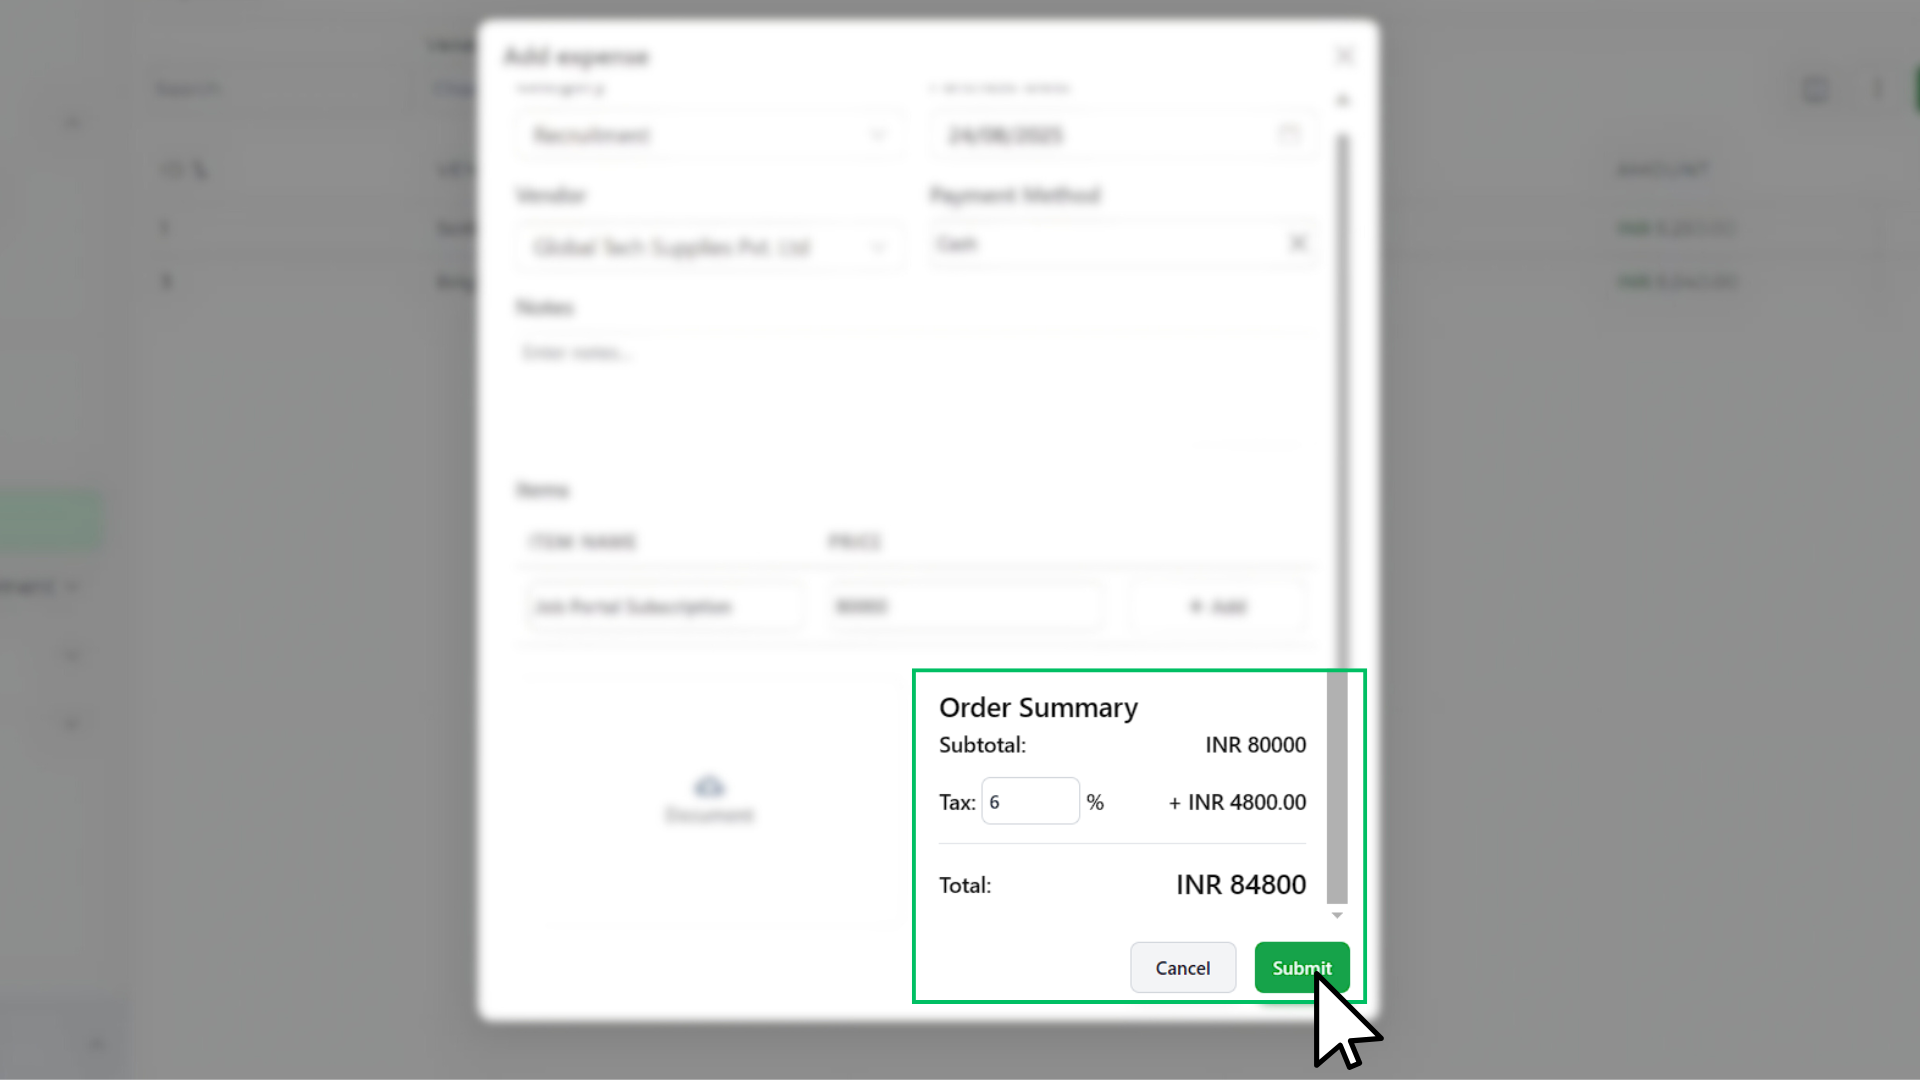
In the Tax field, enter the percentage rate. Tymora will calculate the amount automatically and show it in the Order Summary.
Example:
- Subtotal: ₹4,500
- Tax: 12% → ₹540
- Total: ₹5,040
Tip: The tax ID format depends on your country. For example, in India, you’ll enter a GSTIN. In Iraq, it will be a different ID, or other countries, you’ll enter what applies locally. Tymora supports multiple regions, so you can select the right one based on your country.
Step 10: Save the expense
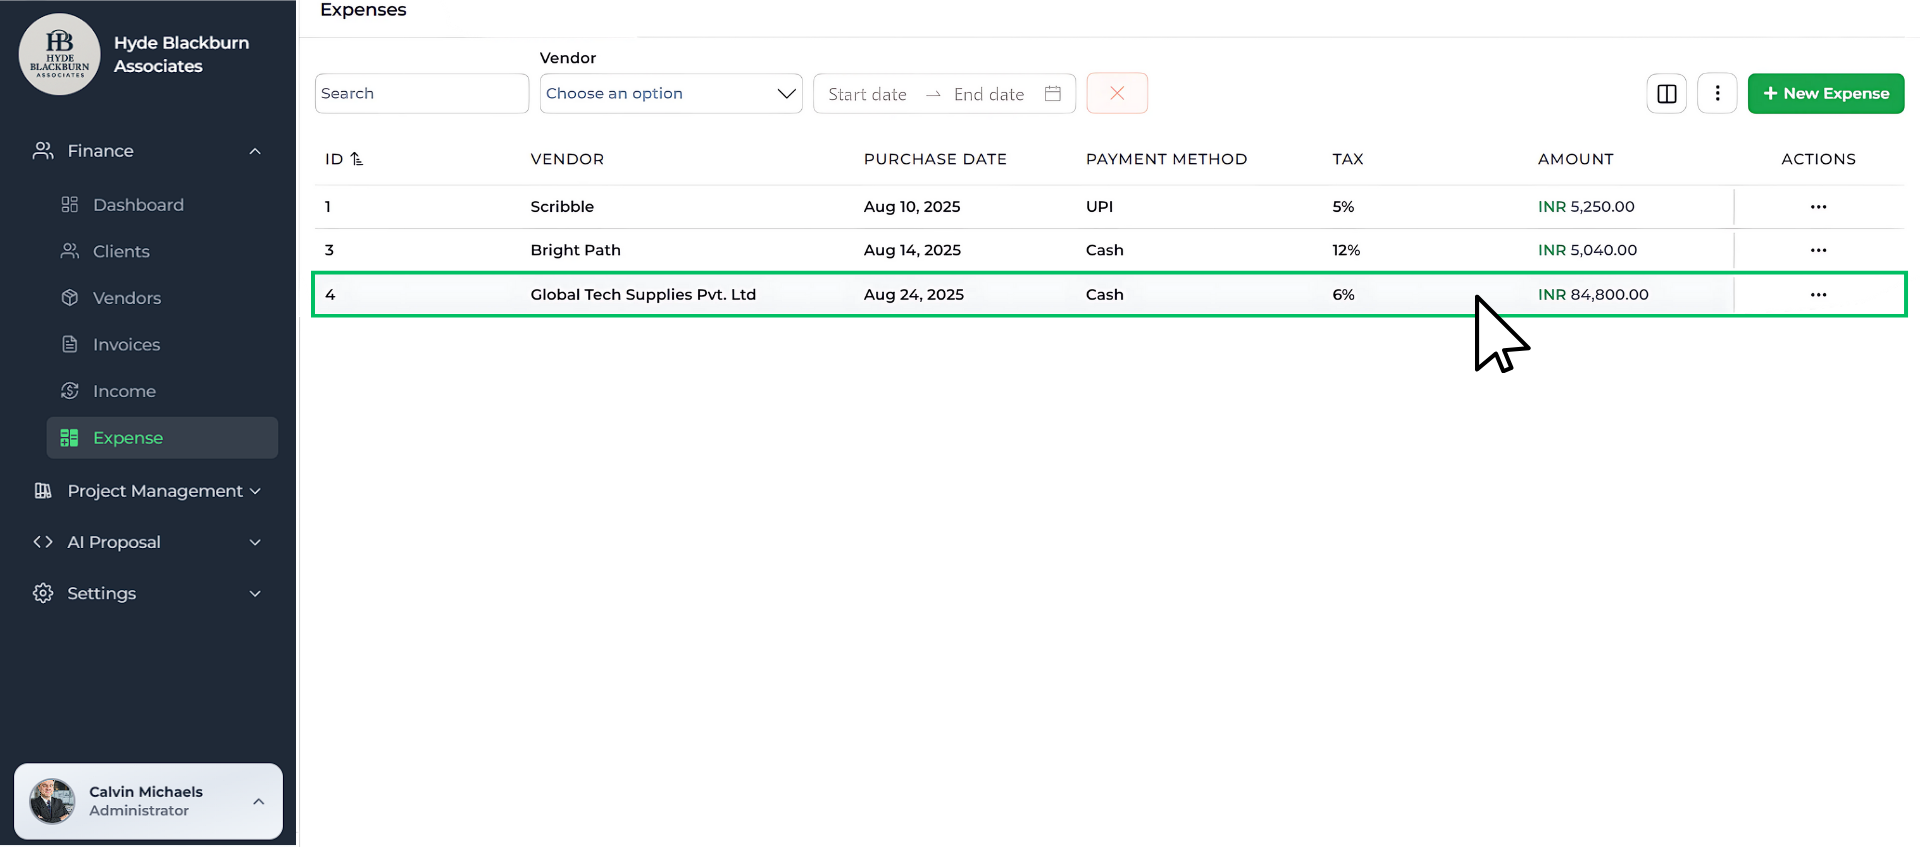
Click Submit once all fields are filled in.
The expense will appear in your list under Finance → Expense showing vendor, purchase date, payment method, tax, and amount.
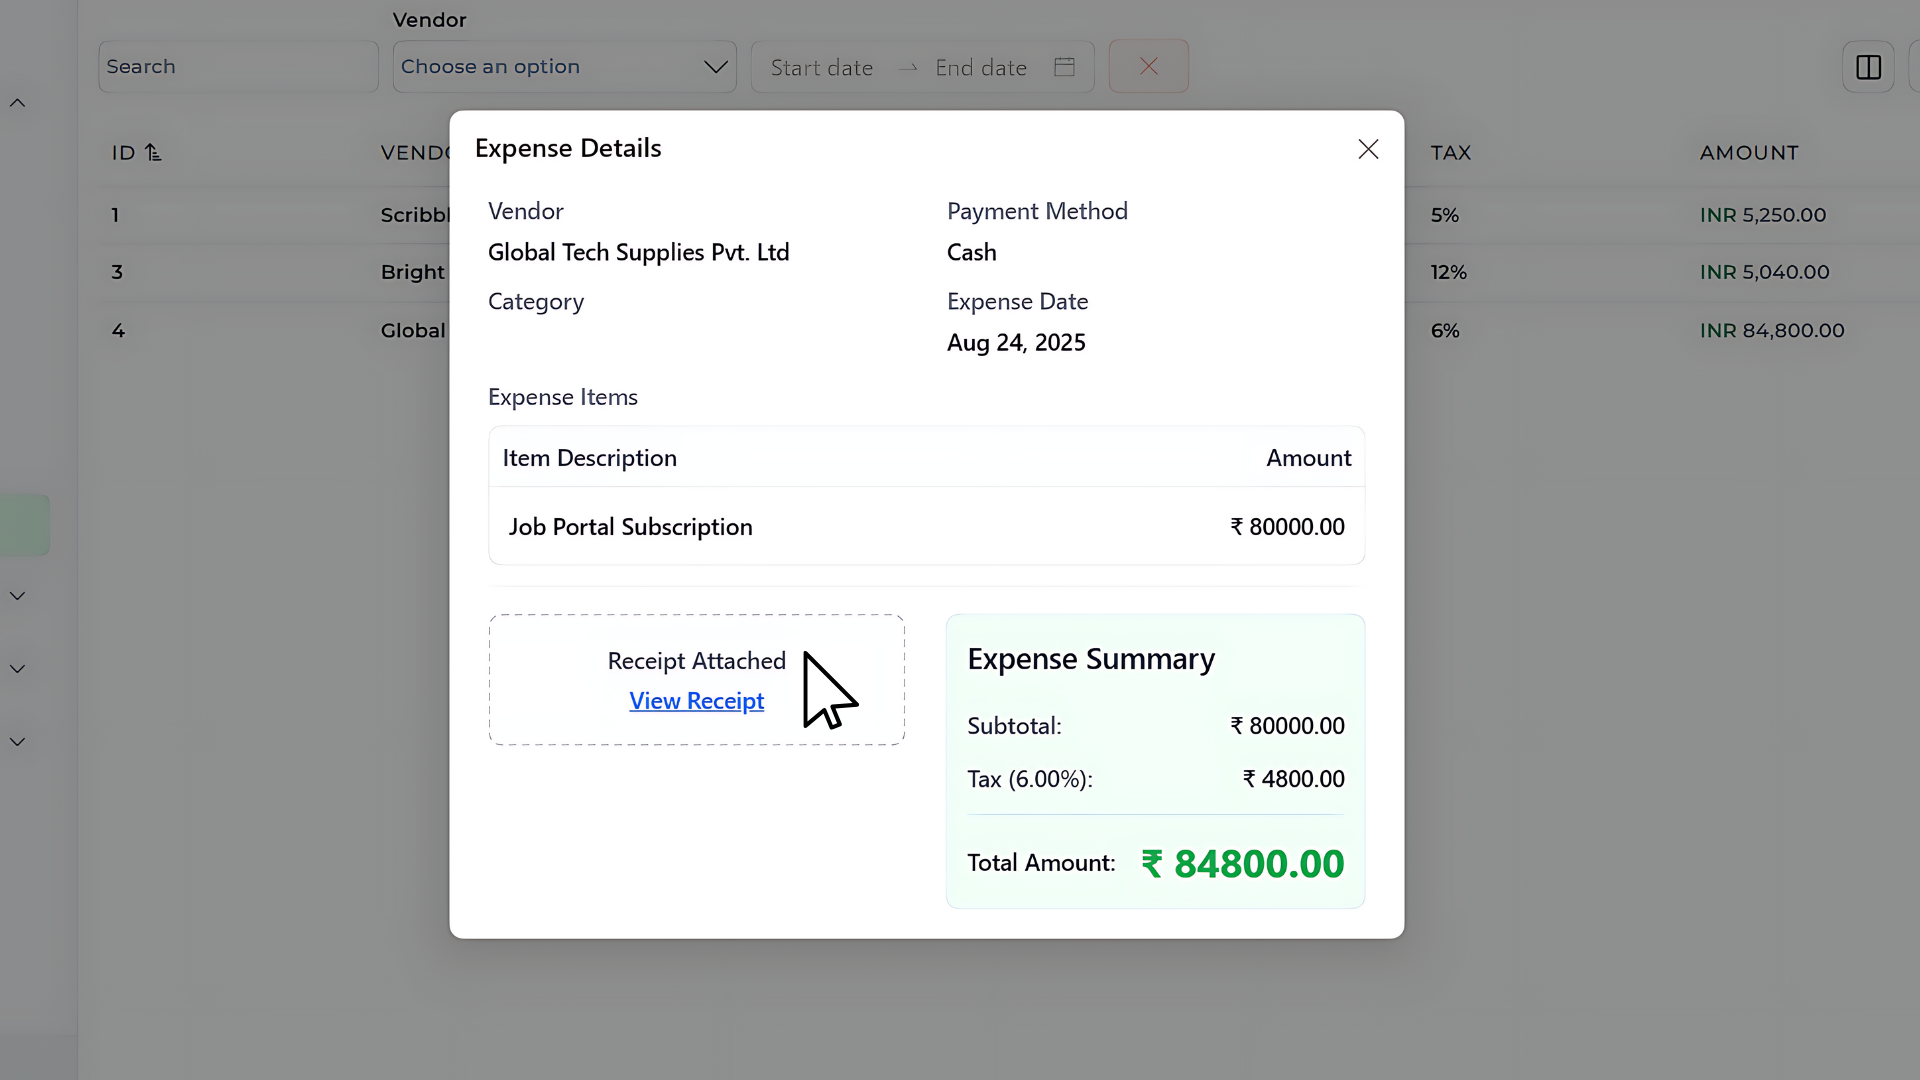
Step 11: View full expense details
To see more info later:
- Click an expense from the list.
- The Expense Details popup will show:
Step 12: Check your dashboard for insights

Expenses automatically appear in your Dashboard analytics.
Here, you can see:
- Total income vs. total expenses
- Spending by category (via pie chart)
- Month-by-month trends
Tracking What You Earn
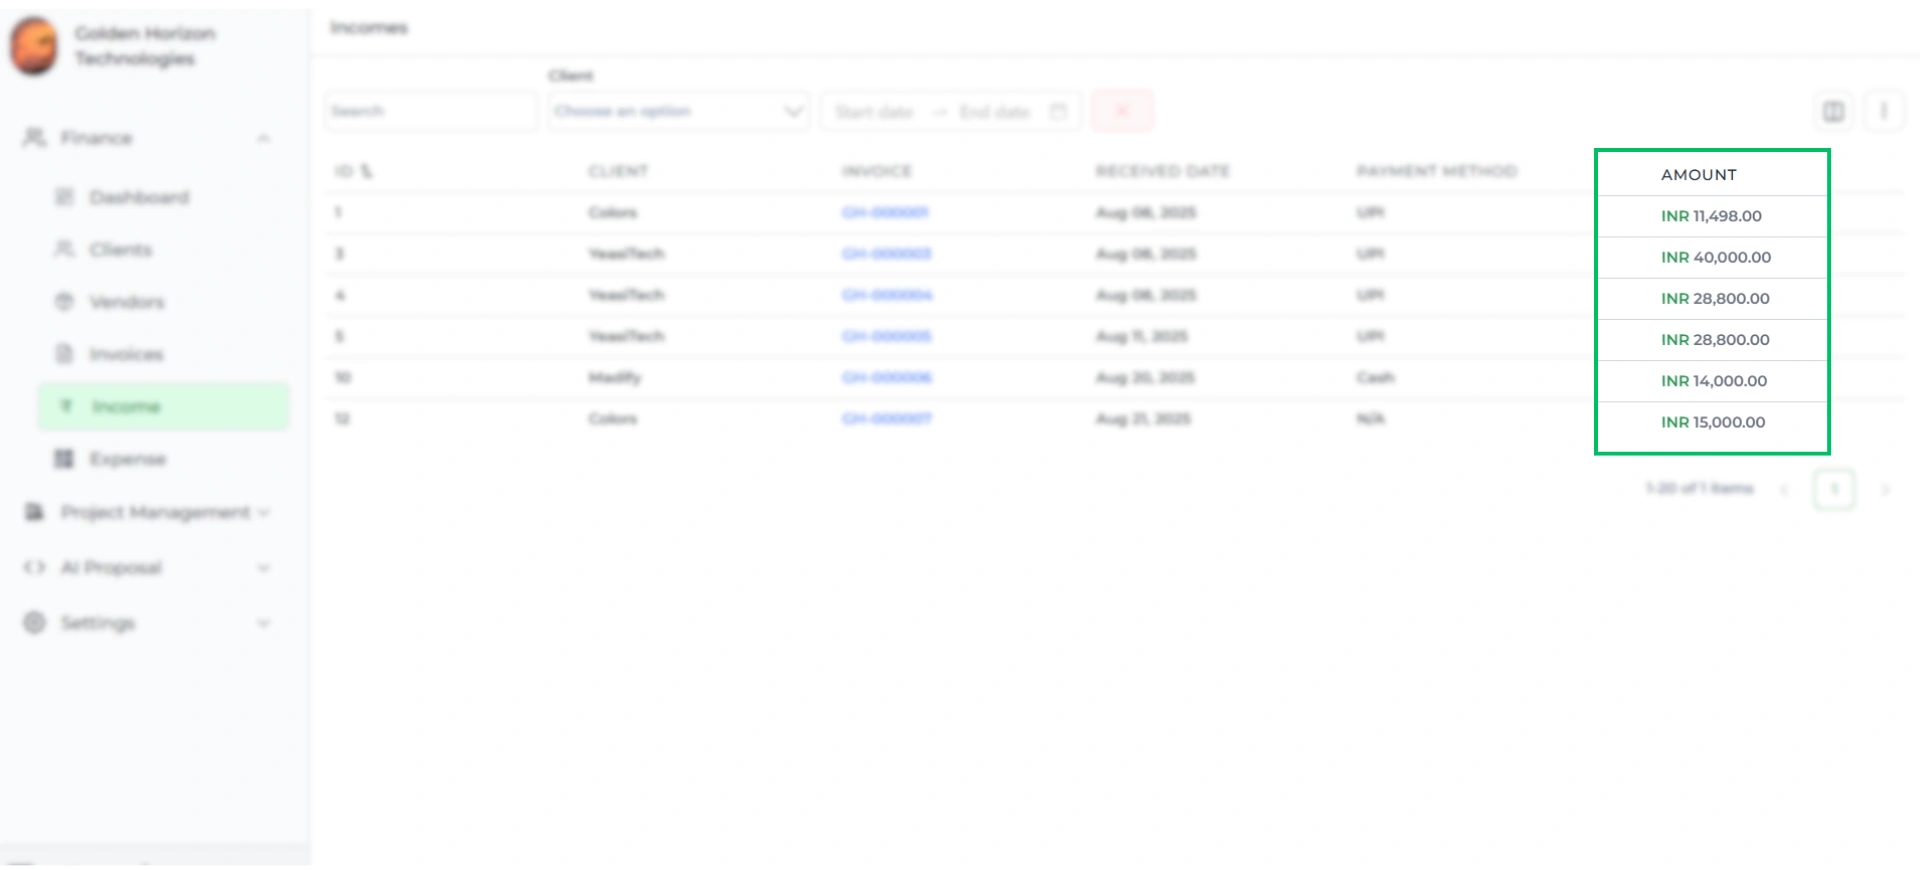
Just like expenses keep your costs in order, your income is automatically managed through invoices in Tymora.
Every time you send an invoice and record a payment, Tymora adds it to your income records — no extra steps needed.
So when it’s time for reports or taxes, you’ll already see both sides of your books: money going out (expenses) and money coming in (income).
Now that expenses are sorted, the other side of tax filing is income.
To learn how to create invoices in Tymora, check our detailed [Invoice Tutorial].
When Tax Time Arrives, Tymora Has You Covered
Adding expenses is just the start — Tymora keeps working in the background to make your entire financial management smooth and stress-free. Instead of juggling receipts, spreadsheets, and guesswork, everything stays organized and tax-ready.
Here’s how Tymora helps you stay in control:
- One workspace for everything – invoices, expenses, vendors, and payments all live in a single platform.
- Automatic organization – every entry is categorized, dated, and linked to vendors for crystal-clear records.
- Smart tax handling – supports multiple regions and calculates tax instantly, so you never worry about errors.
- Secure document storage – receipts and proofs are safely stored alongside each expense.
- Real-time insights – dashboards show spending patterns, income vs. expenses, and category breakdowns at a glance.
- Ready for tax time – with everything already recorded, generating reports for filing takes minutes, not hours.
With Tymora, managing your business finances feels less like bookkeeping and more like having a reliable assistant that never misses a detail.
What's inside?
Categories
Customer Success Stories
See how agencies and freelancers are transforming their businesses with Tymora
Tymora has completely transformed how I manage my freelance business. From invoicing to tracking expenses, everything is streamlined and effortless.

Monowar Iqbal Layek
Freelancer
Managing my freelance work is so much easier with Tymora. Invoicing is fast, expense tracking is simple, and I feel more organized than ever.

Sandeep Acharya
Freelancer
Tymora made managing my freelance projects and finances seamless. The platform is intuitive, and support is always responsive and helpful.

Samsur Rahaman
Automation Framework Architect